How to add a wallet in QryptoPay
A wallet is a required component for the correct operation of the QryptoPay module. It is used to generate derived payment addresses for your customers. If no wallet is added, the corresponding payment method will not be available on the payment page.
You can create a wallet using any cryptocurrency application or service you trust. Since different blockchains use different address generation algorithms, below are examples for some of the supported cryptocurrencies.
⚠️ Warning
To accept tokens (USDT, USDC), you must add a wallet in the specific network you plan to use. For example, to accept USDT TRC-20, you need to add a wallet on the Tron (TRX) network.
Bitcoin, Litecoin, and similar blockchains
Bitcoin and derived blockchains use an Extended public key to generate derived sub-wallets. This approach allows you to receive funds without granting access to manage them, so payments can be safely sent directly to your main wallet.
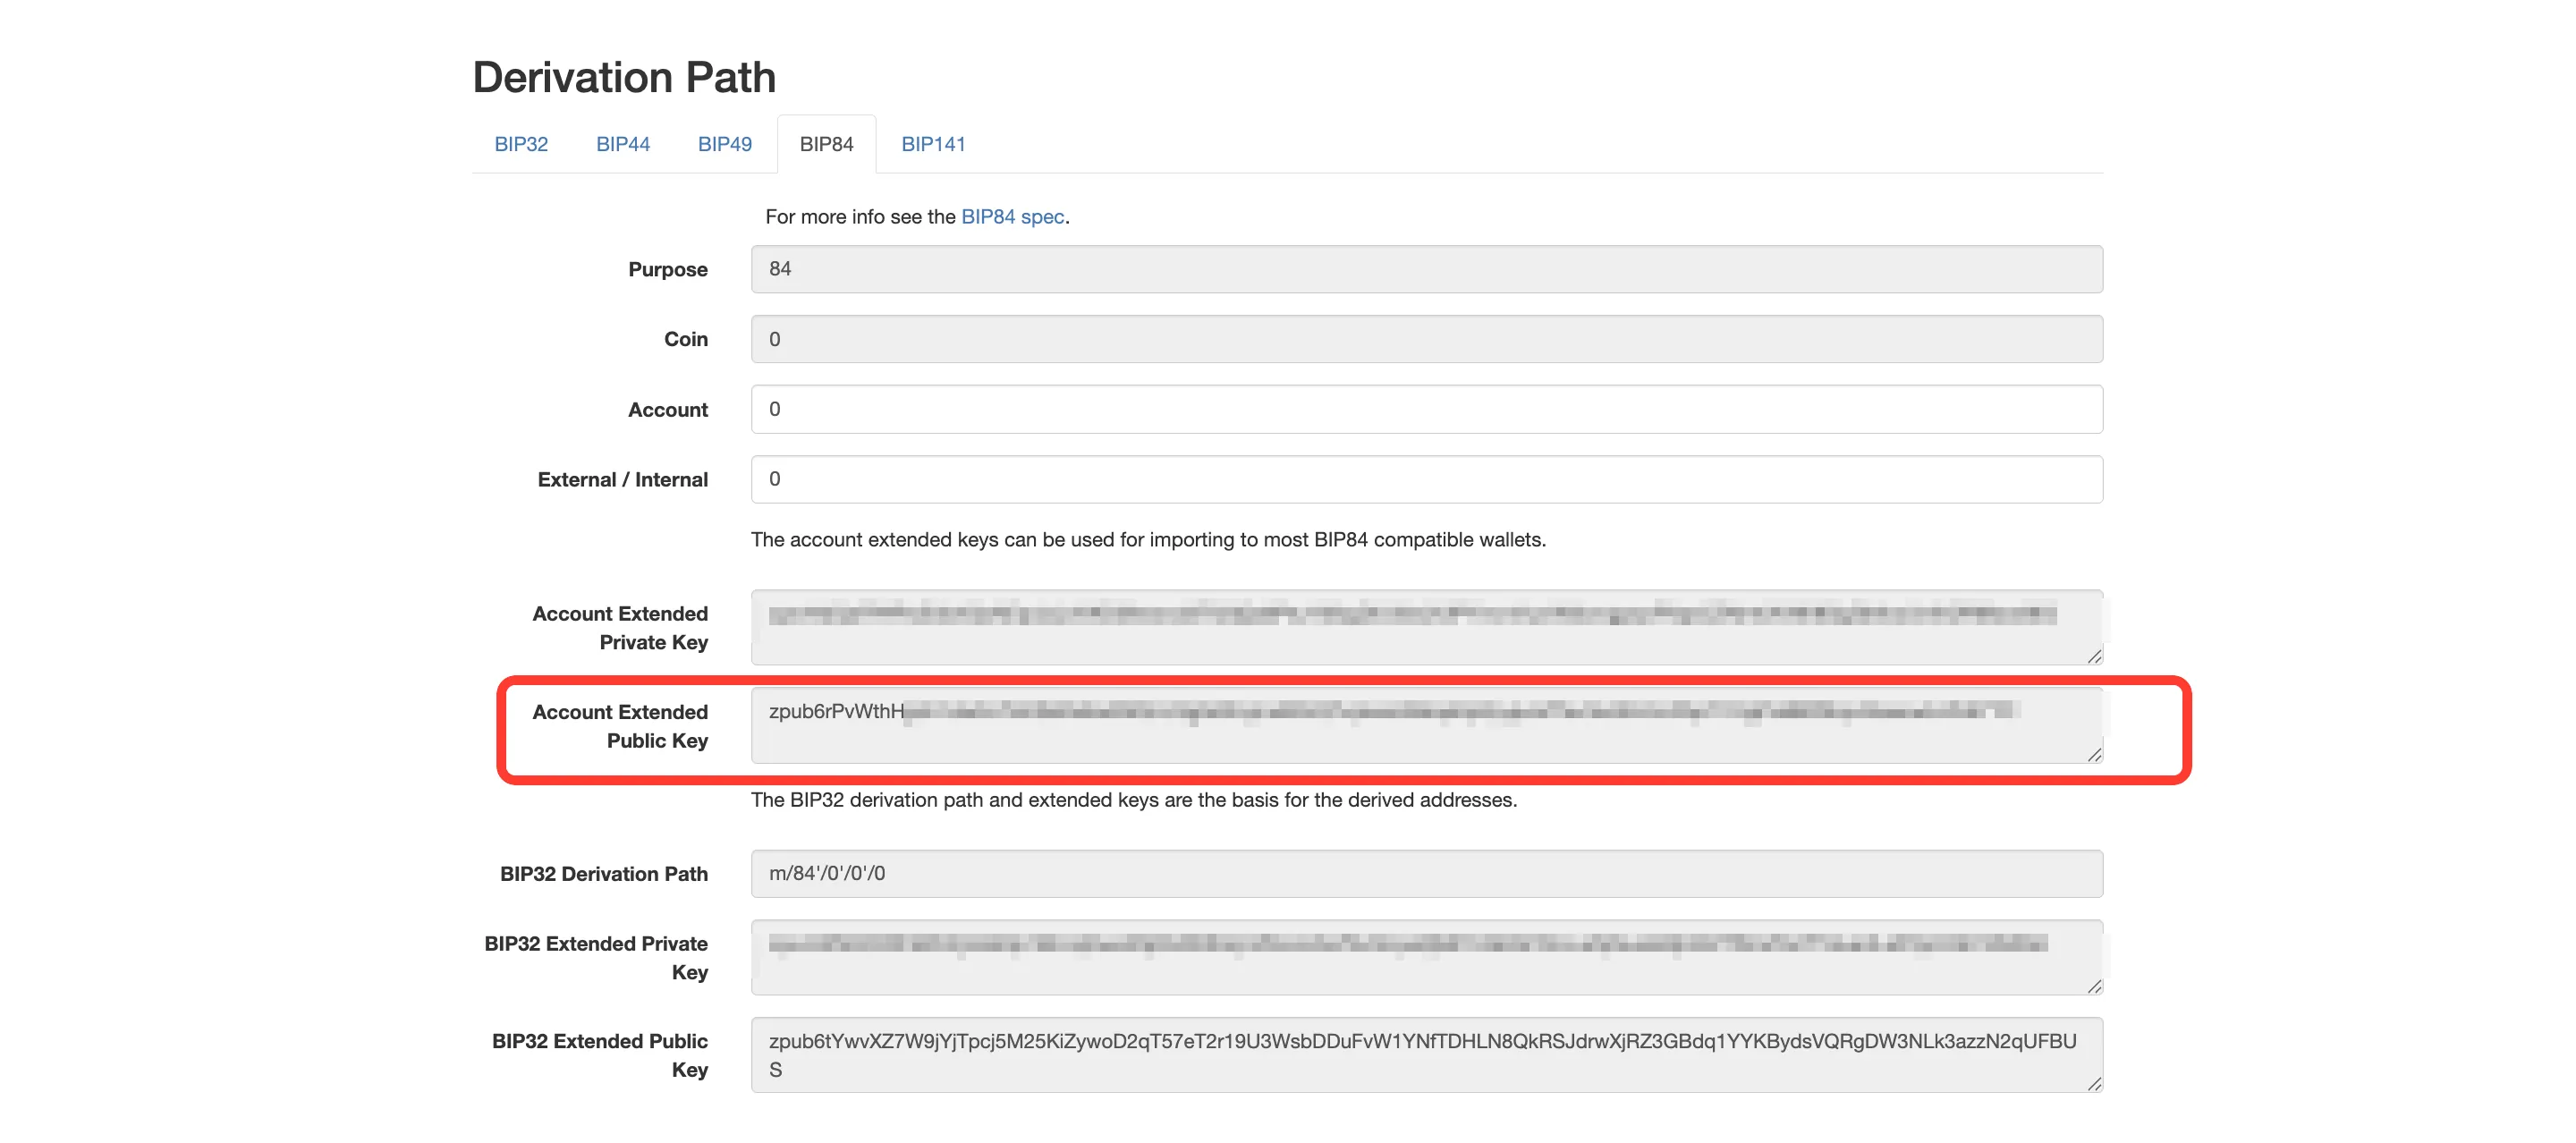
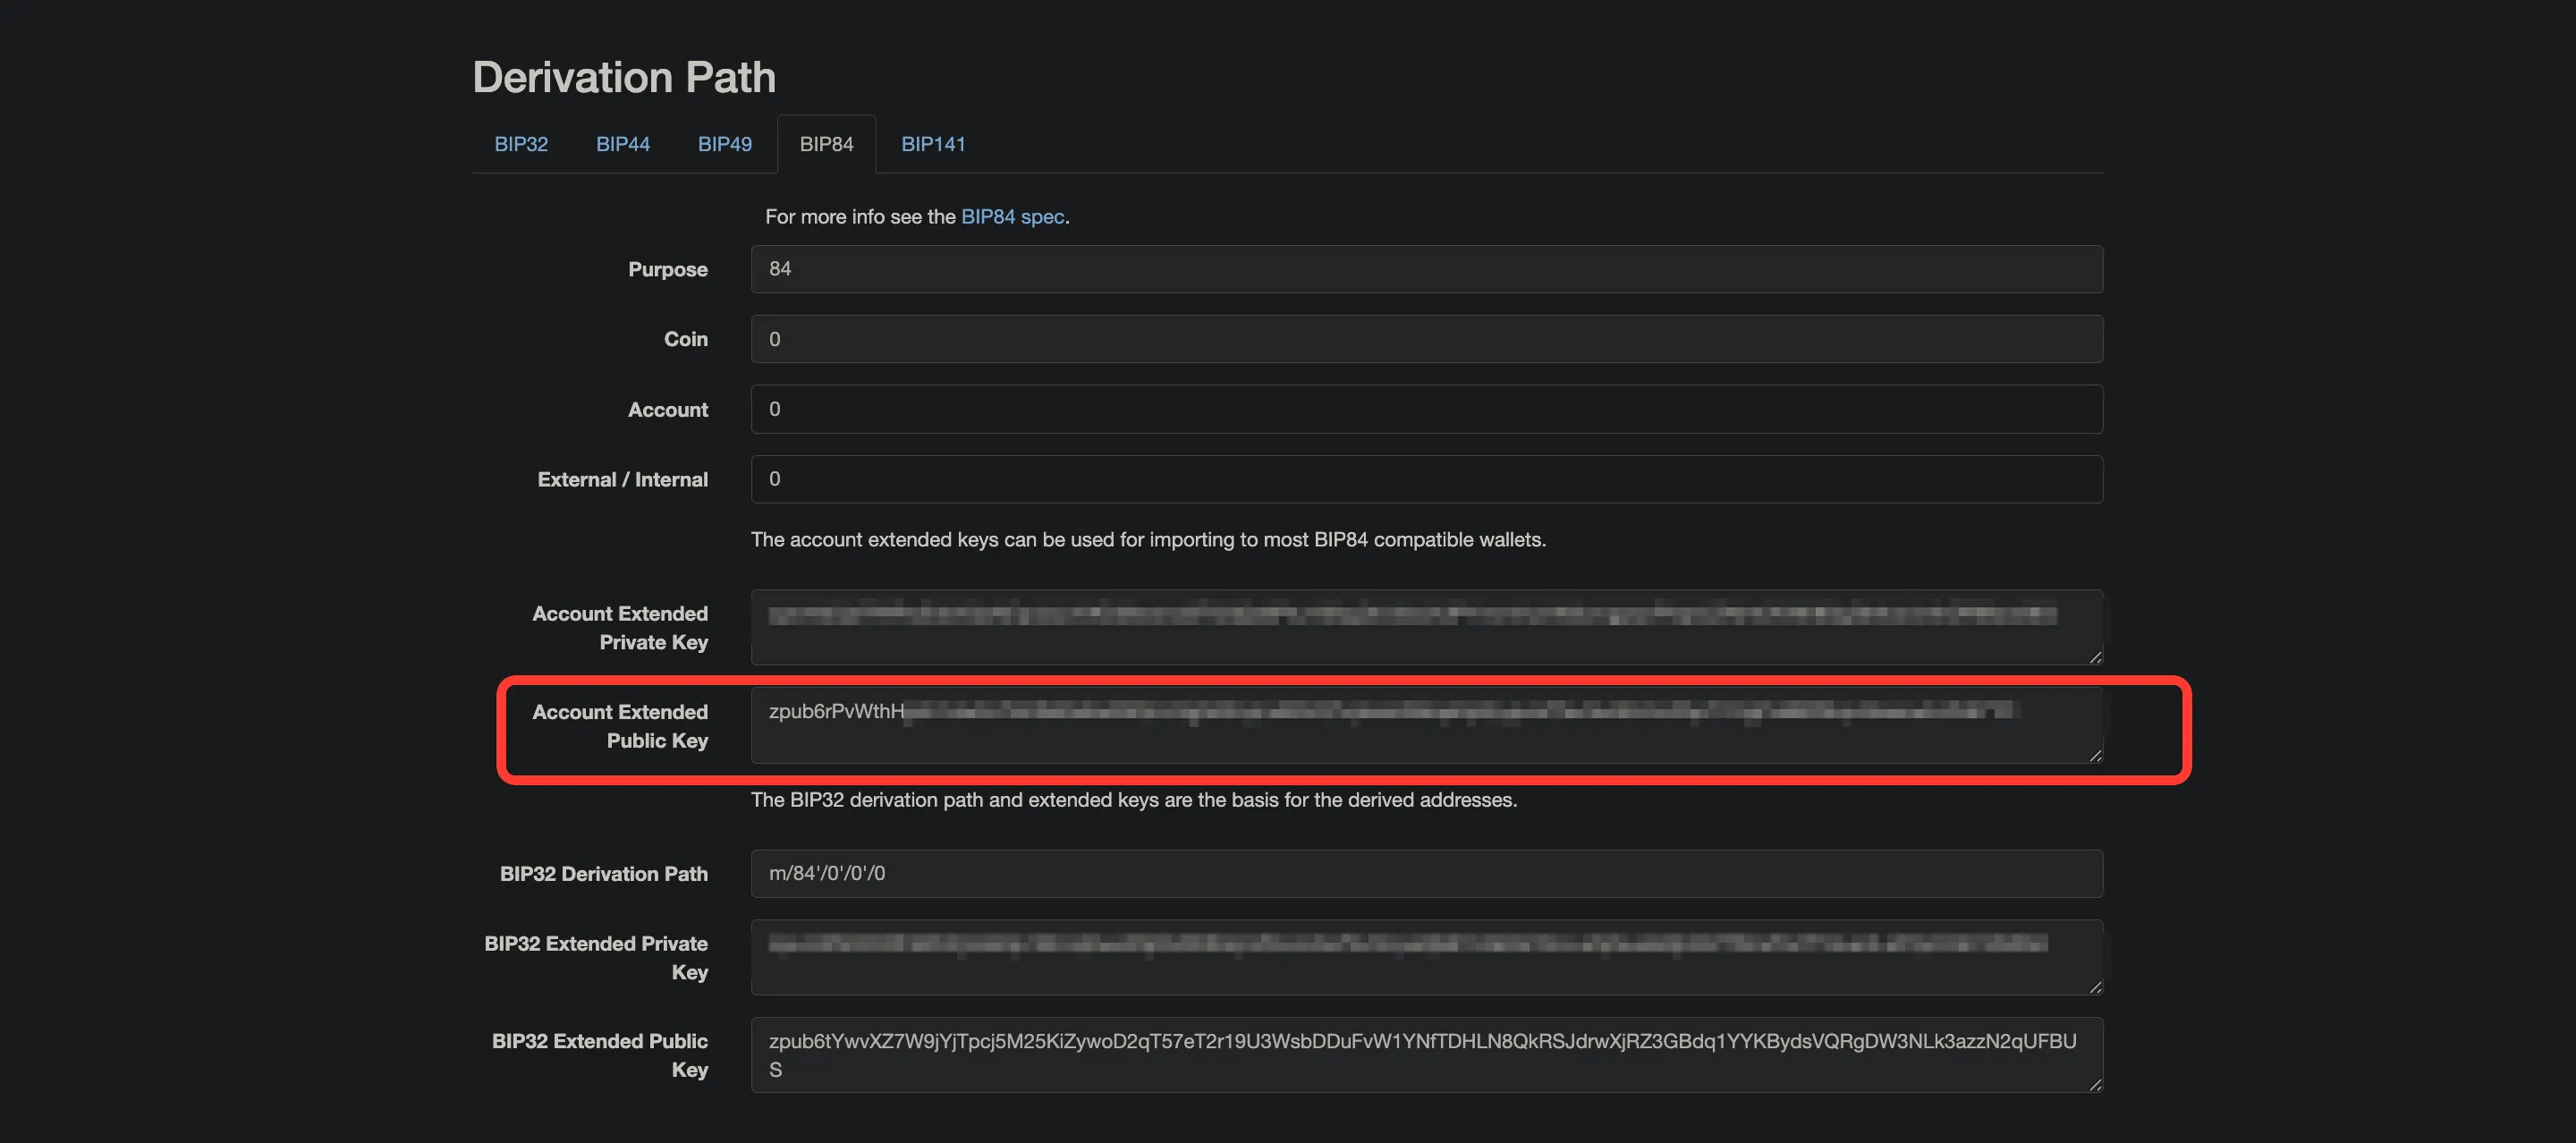
To obtain an extended public key:
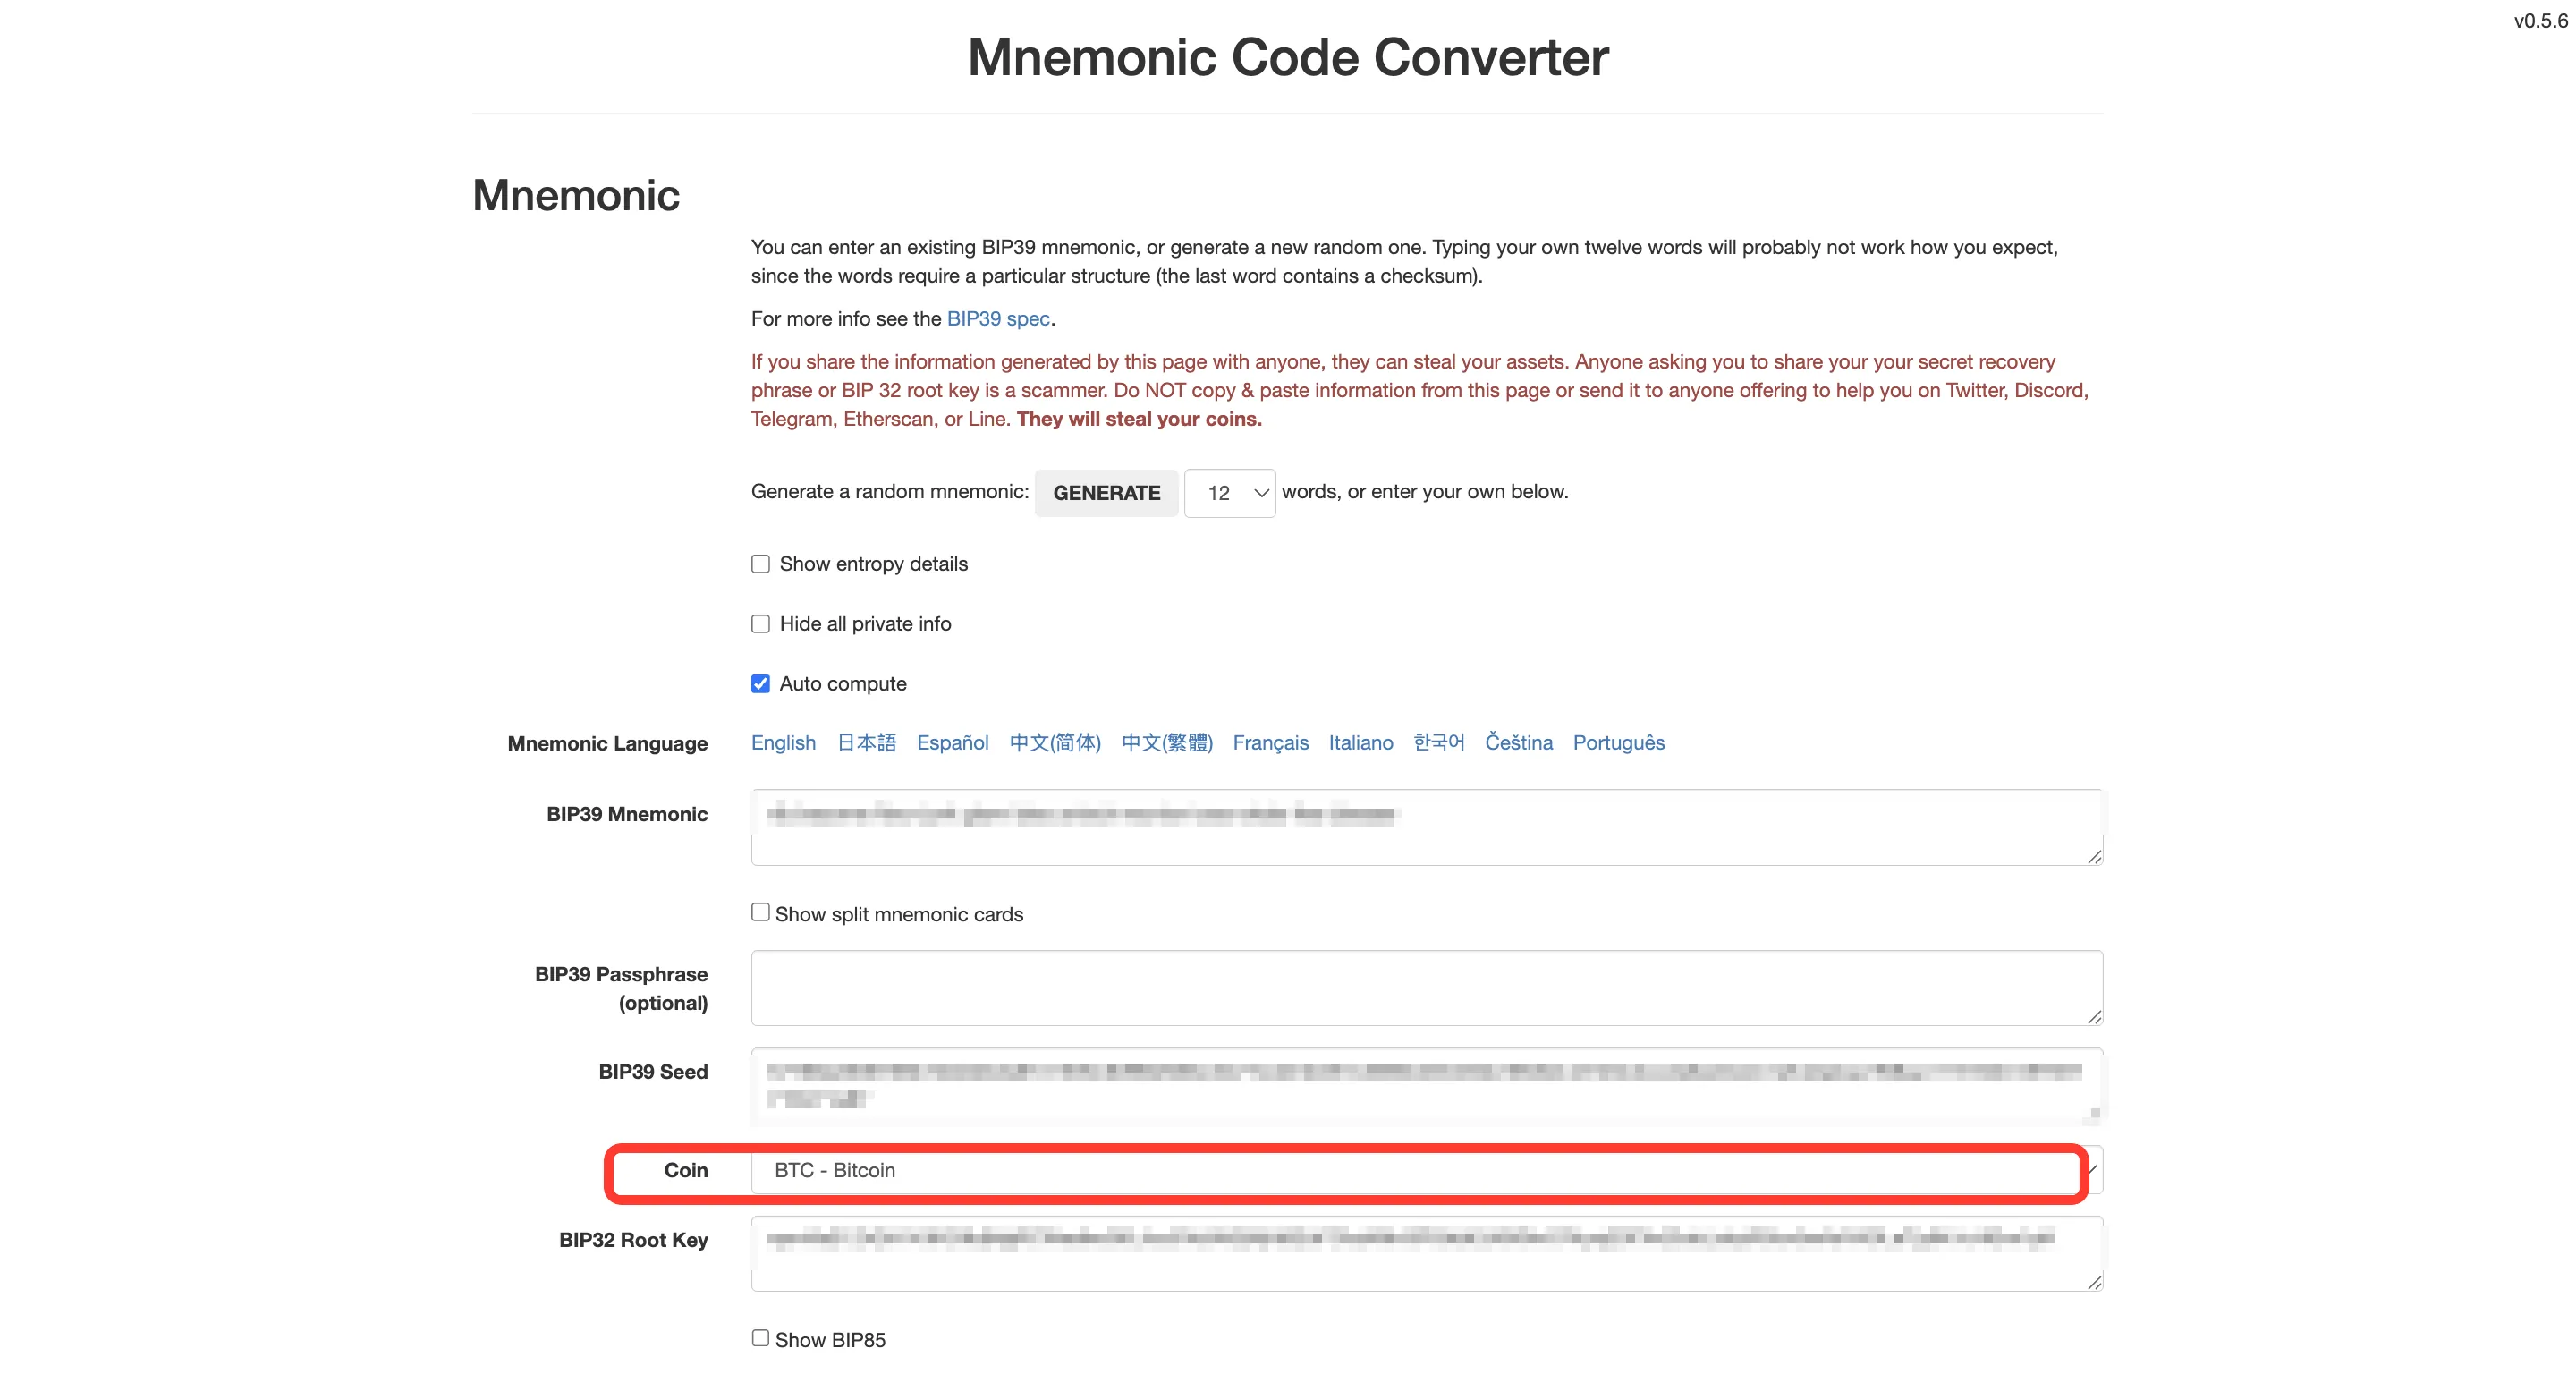
- open https://iancoleman.io/bip39/;
- (strongly recommended) completely disconnect your computer from the internet (Wi-Fi, LTE, etc.);
- enter your mnemonic phrase;
- select BIP84, copy the Extended public key, and store it locally;
- close the tab and restore the internet connection.
Next, go to QryptoPay → Overview → Latest wallets → Add wallet and specify the following parameters:
- Name — any convenient name (can be changed later);
- Blockchain — BTC (or LTC if you are adding Litecoin);
- Address format — the address type of your wallet (also known as witness type);
- Public key — the generated Extended public key;
- Notification email — your email address to receive wallet status notifications.
After creating the wallet, you will be able to accept payments in the selected blockchain currency.
💡 Tip
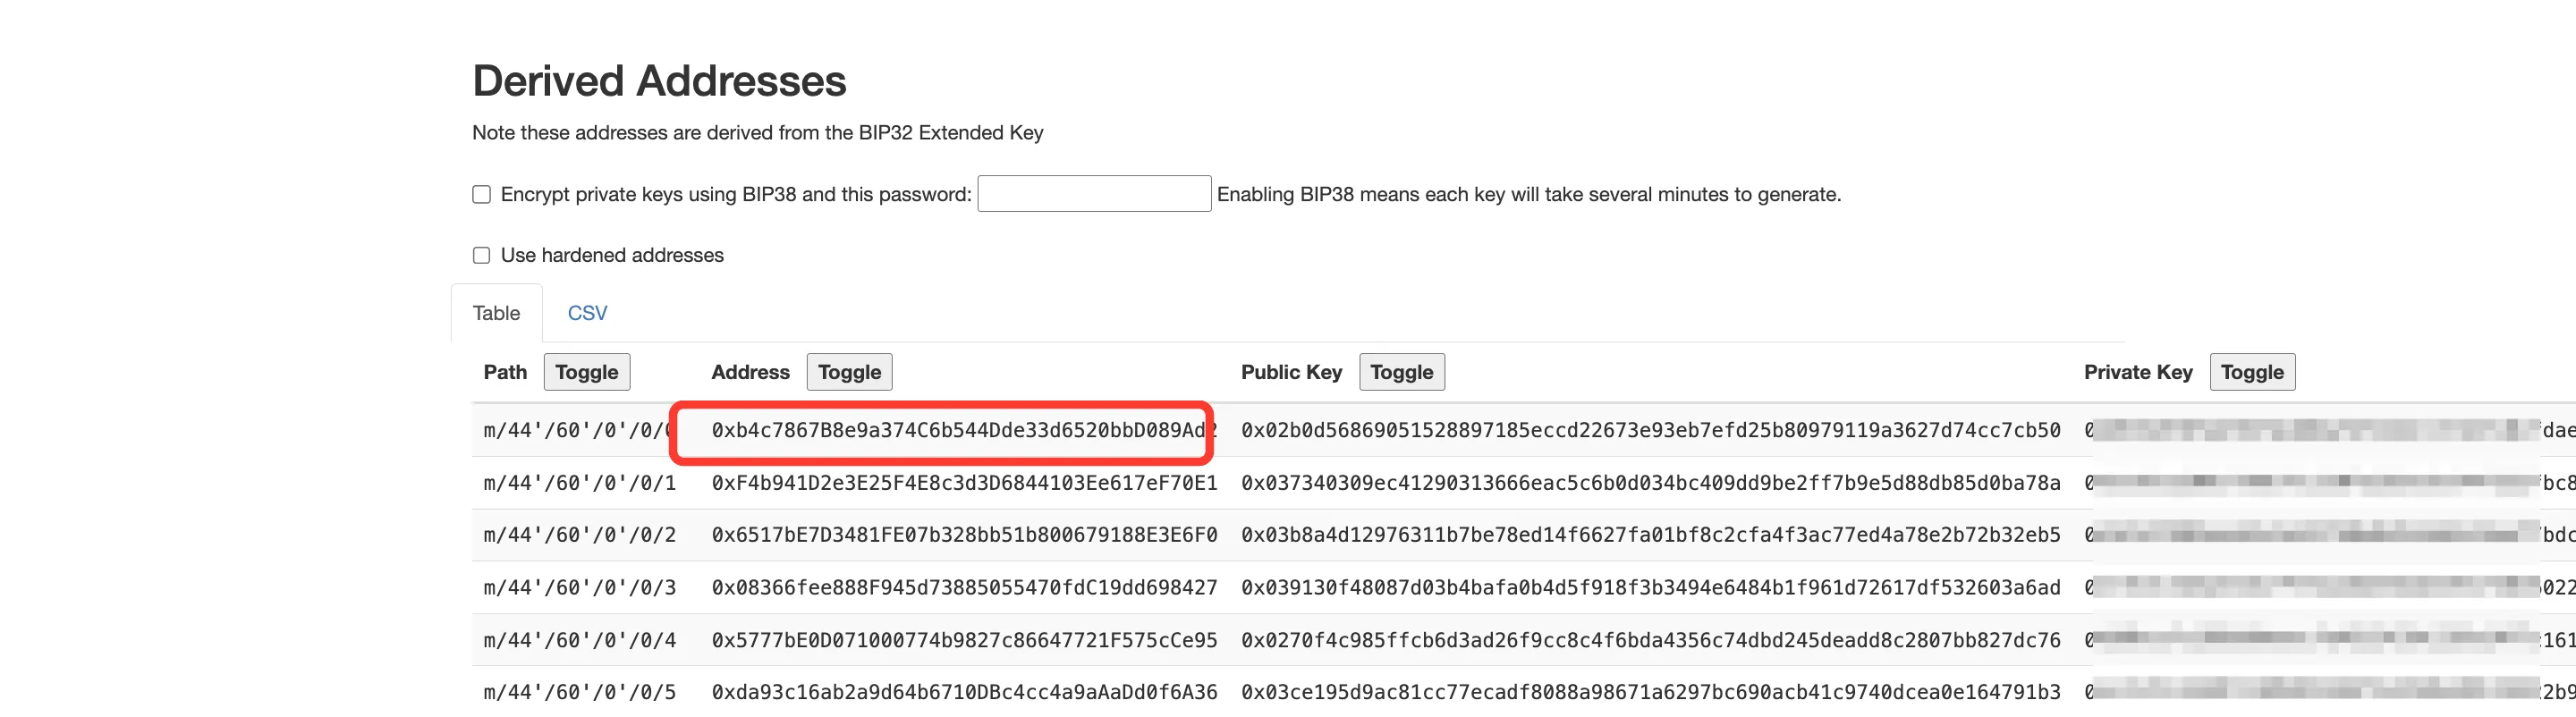
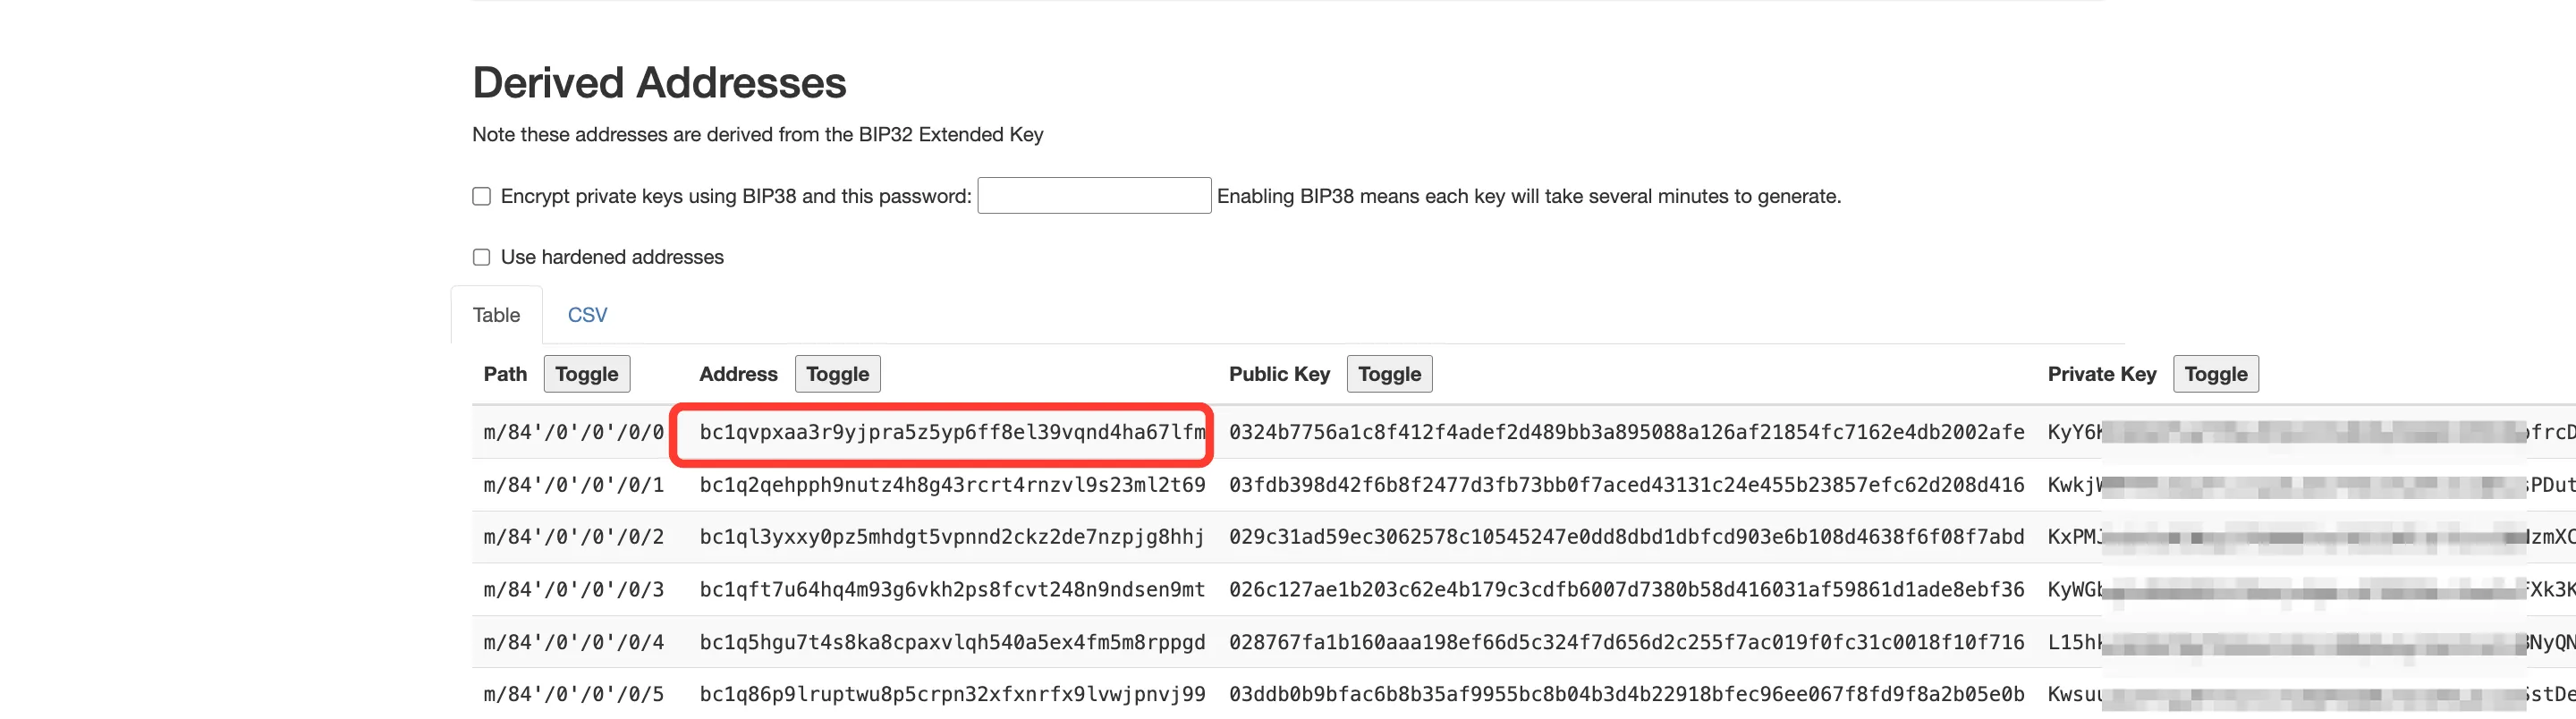
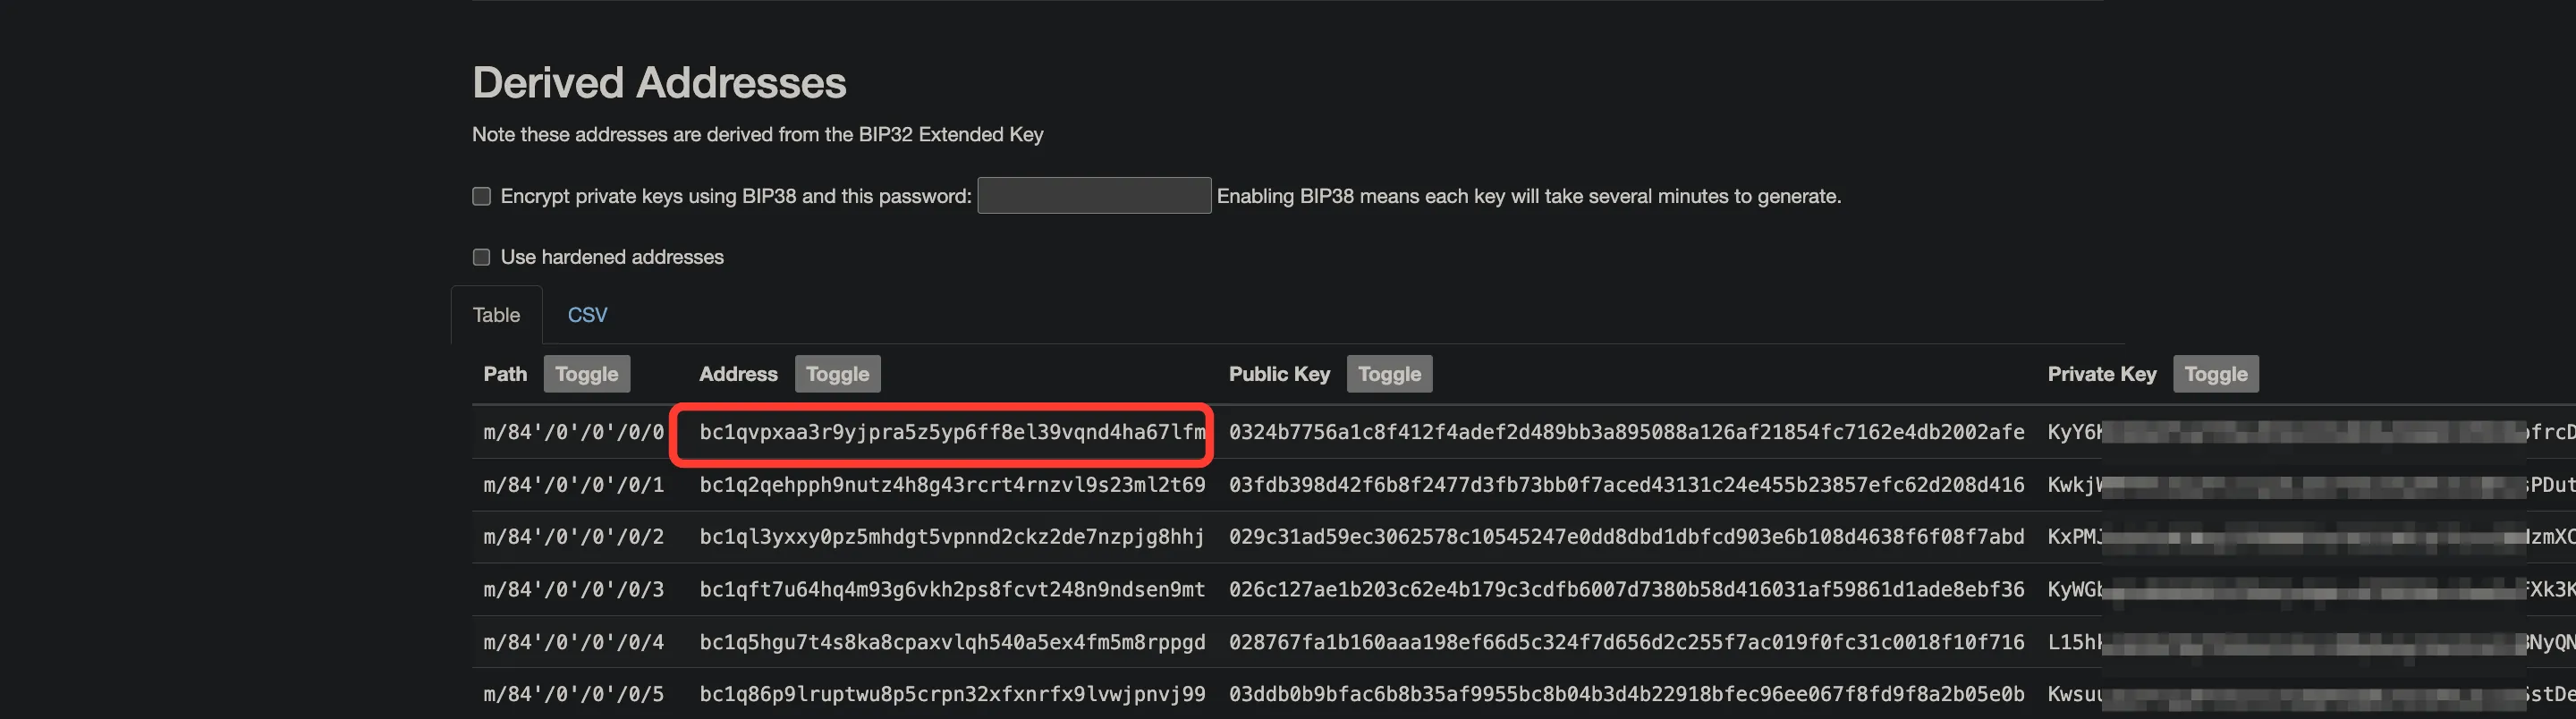
Before saving, click Verify key and enter your wallet's primary address — the first address (index 0) in the derived-addresses table under the BIP84 tab. If it matches, the key is correct.
Ethereum, Tron, and similar blockchains
Ethereum and similar blockchains use a private key to generate derived sub-wallets, which provides full access to the funds. For this reason, it is strongly recommended to create a separate “dummy” wallet in a third-party service and use it only as an intermediate wallet for receiving customer payments.
When adding the wallet to QryptoPay, you can specify a payout wallet — this will be your main wallet, to which all received funds will be automatically transferred.
⚠️ Warning
The wallet must have a minimum balance required to cover network fees for internal transactions.
⚠️ Warning
Micro-transactions on the Tron network (less than 0.5 TRX, 500,000 SUN) are not processed due to periodic blockchain spam.
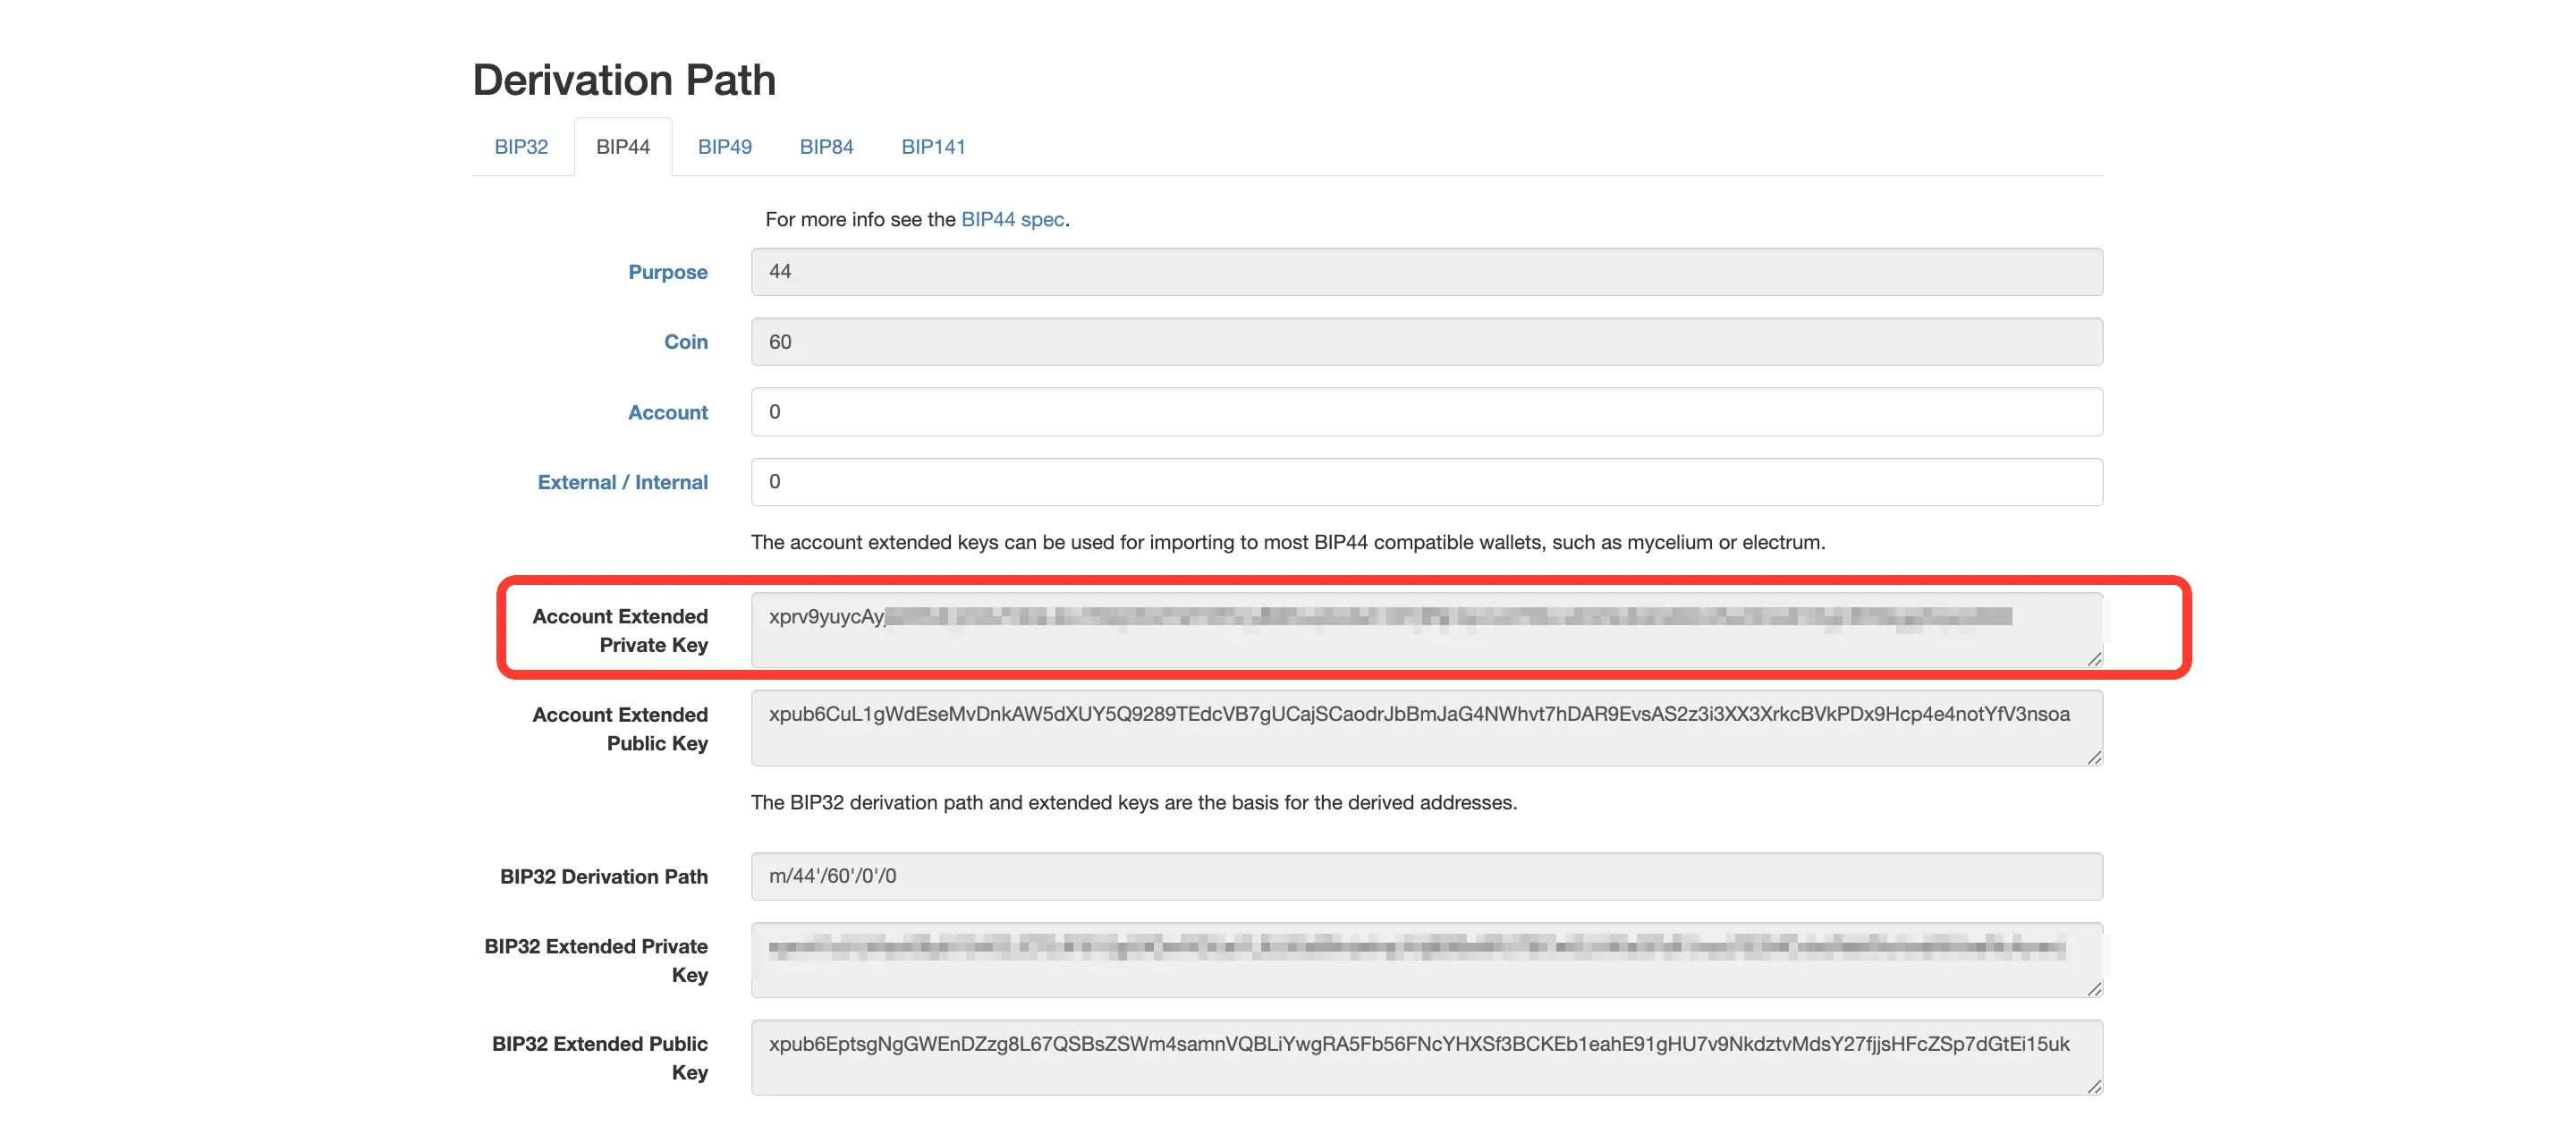
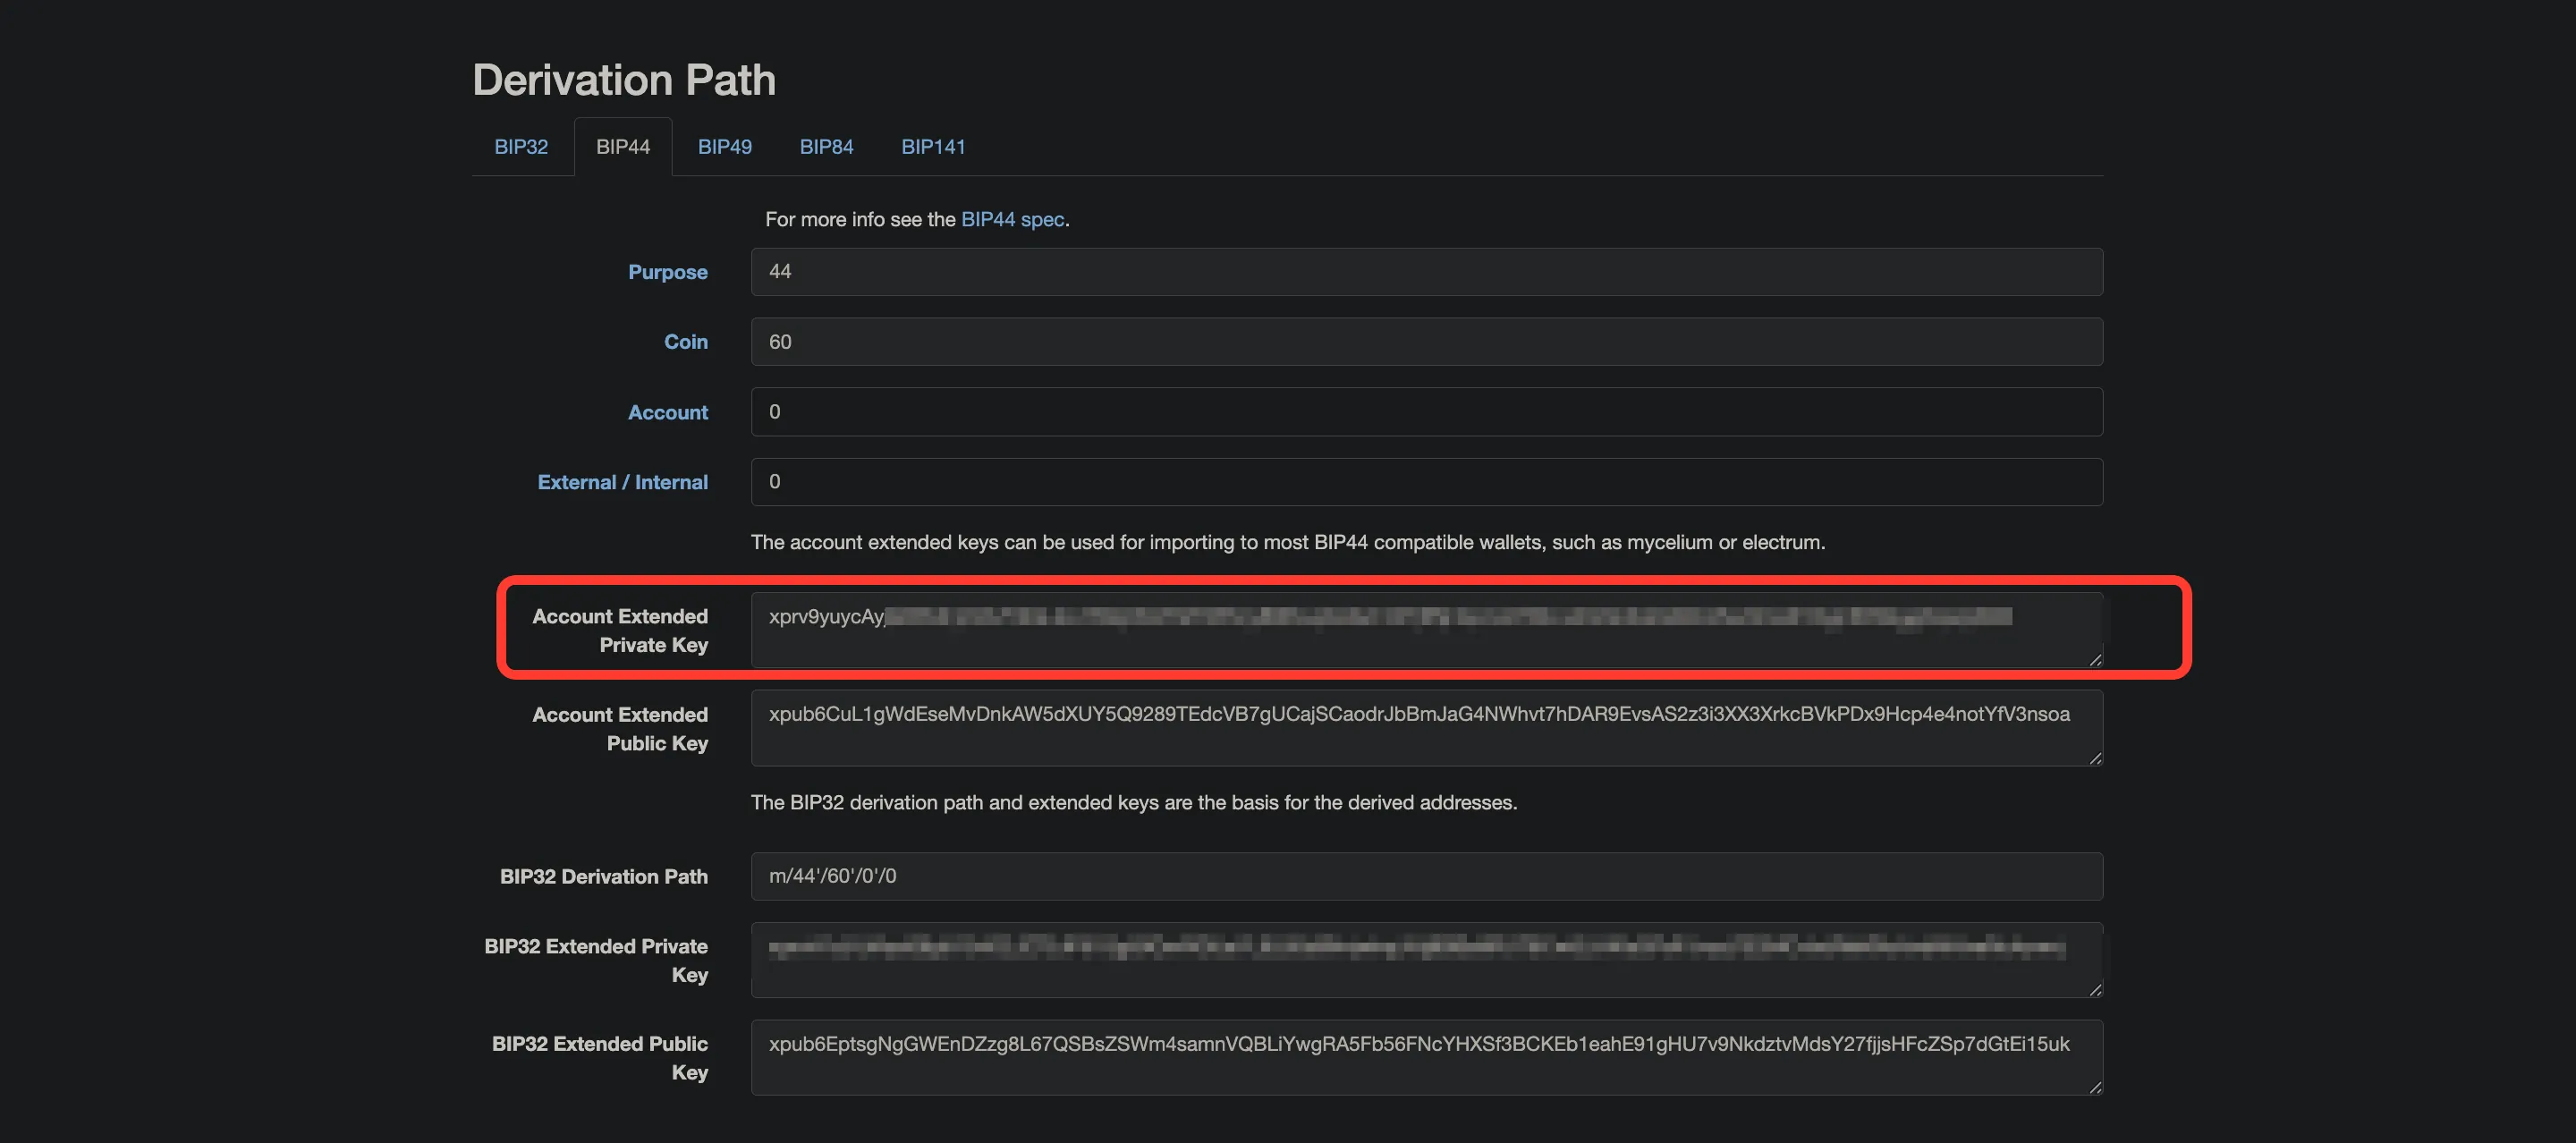
To obtain the key:
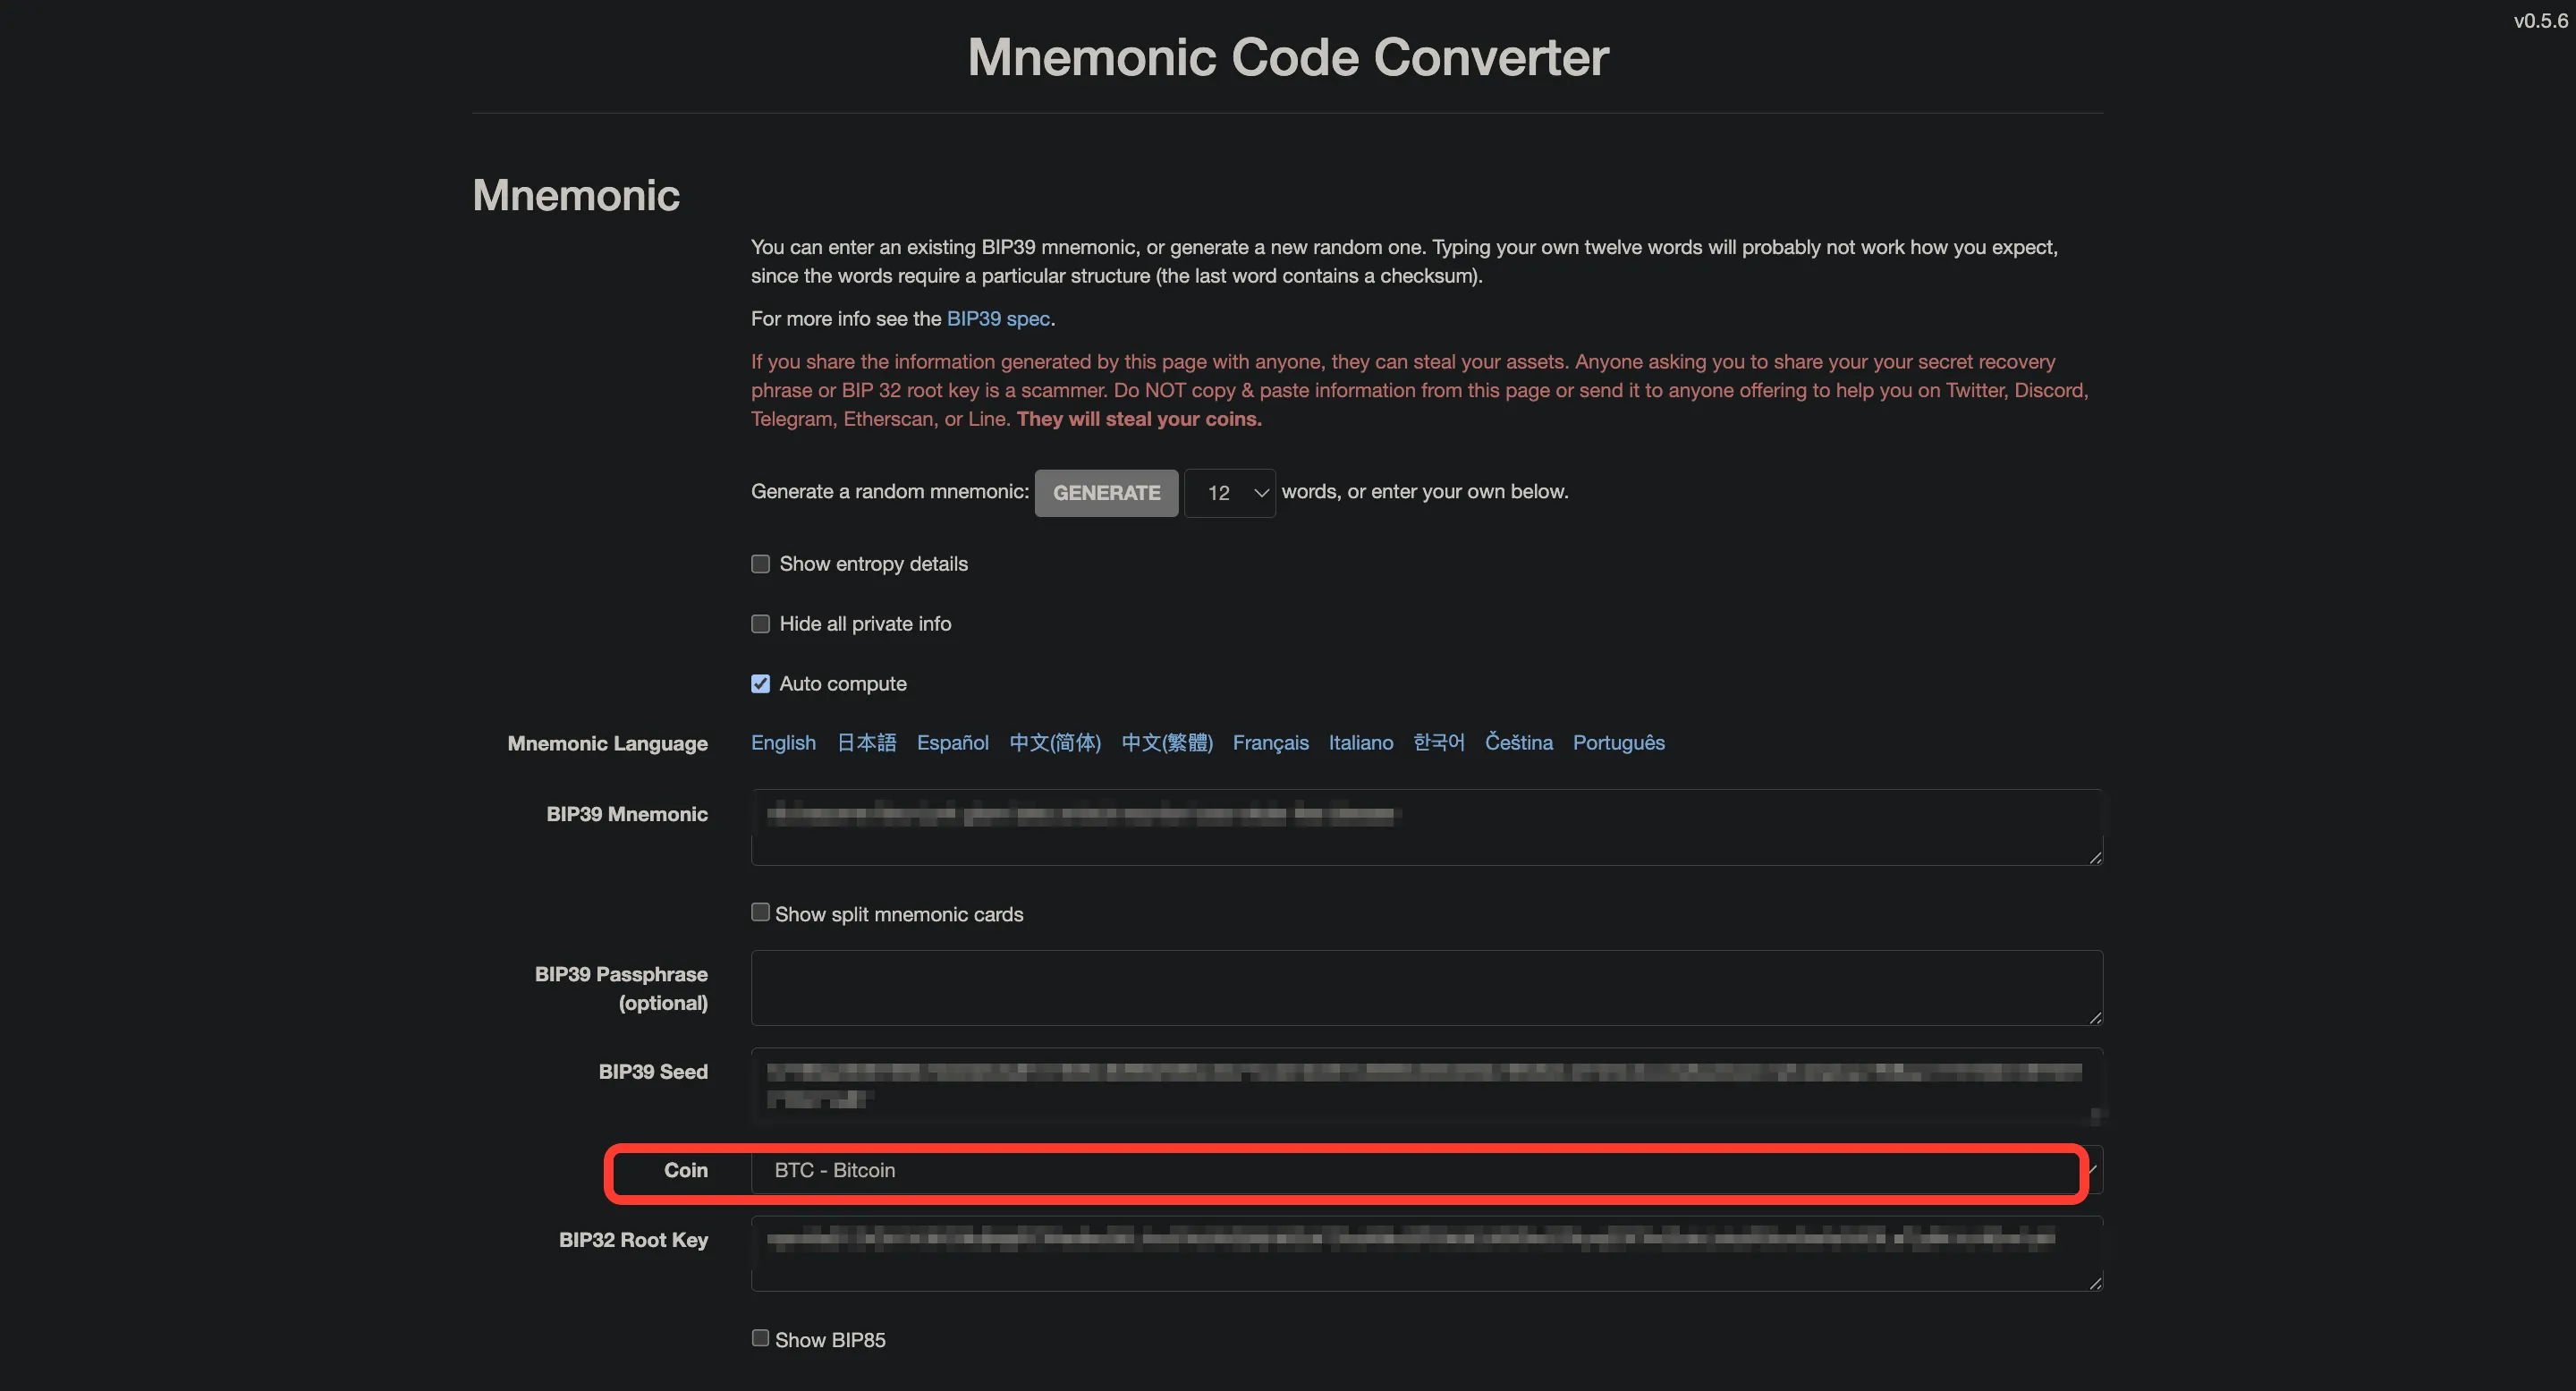
- open https://iancoleman.io/bip39/;
- (strongly recommended) completely disconnect your computer from the internet;
- enter your mnemonic phrase in the BIP39 Mnemonic field;
- in the Coin dropdown select ETH (or TRX for Tron);
- in the Derivation Path section switch to the BIP44 tab;
- copy the Account Extended Private Key — the long value in the BIP44 block, not the short Private Key shown in the derived-addresses table at the bottom — and store it locally;
- close the tab and restore the internet connection.
Then go to QryptoPay → Overview → Latest wallets → Add wallet and fill in the following fields:
- Name — any convenient name;
- Blockchain — ETH (or TRX for Tron);
- Private key — the Account Extended Private Key you copied;
- Payout wallet — your personal wallet where customer funds will be transferred;
- Payout threshold — the amount above which funds will be automatically transferred (relevant for Tron, where transactions incur fees);
- Notification email — your email address to receive wallet status notifications.
After creating the wallet, you will be able to accept payments in the corresponding blockchain currency.
💡 Tip
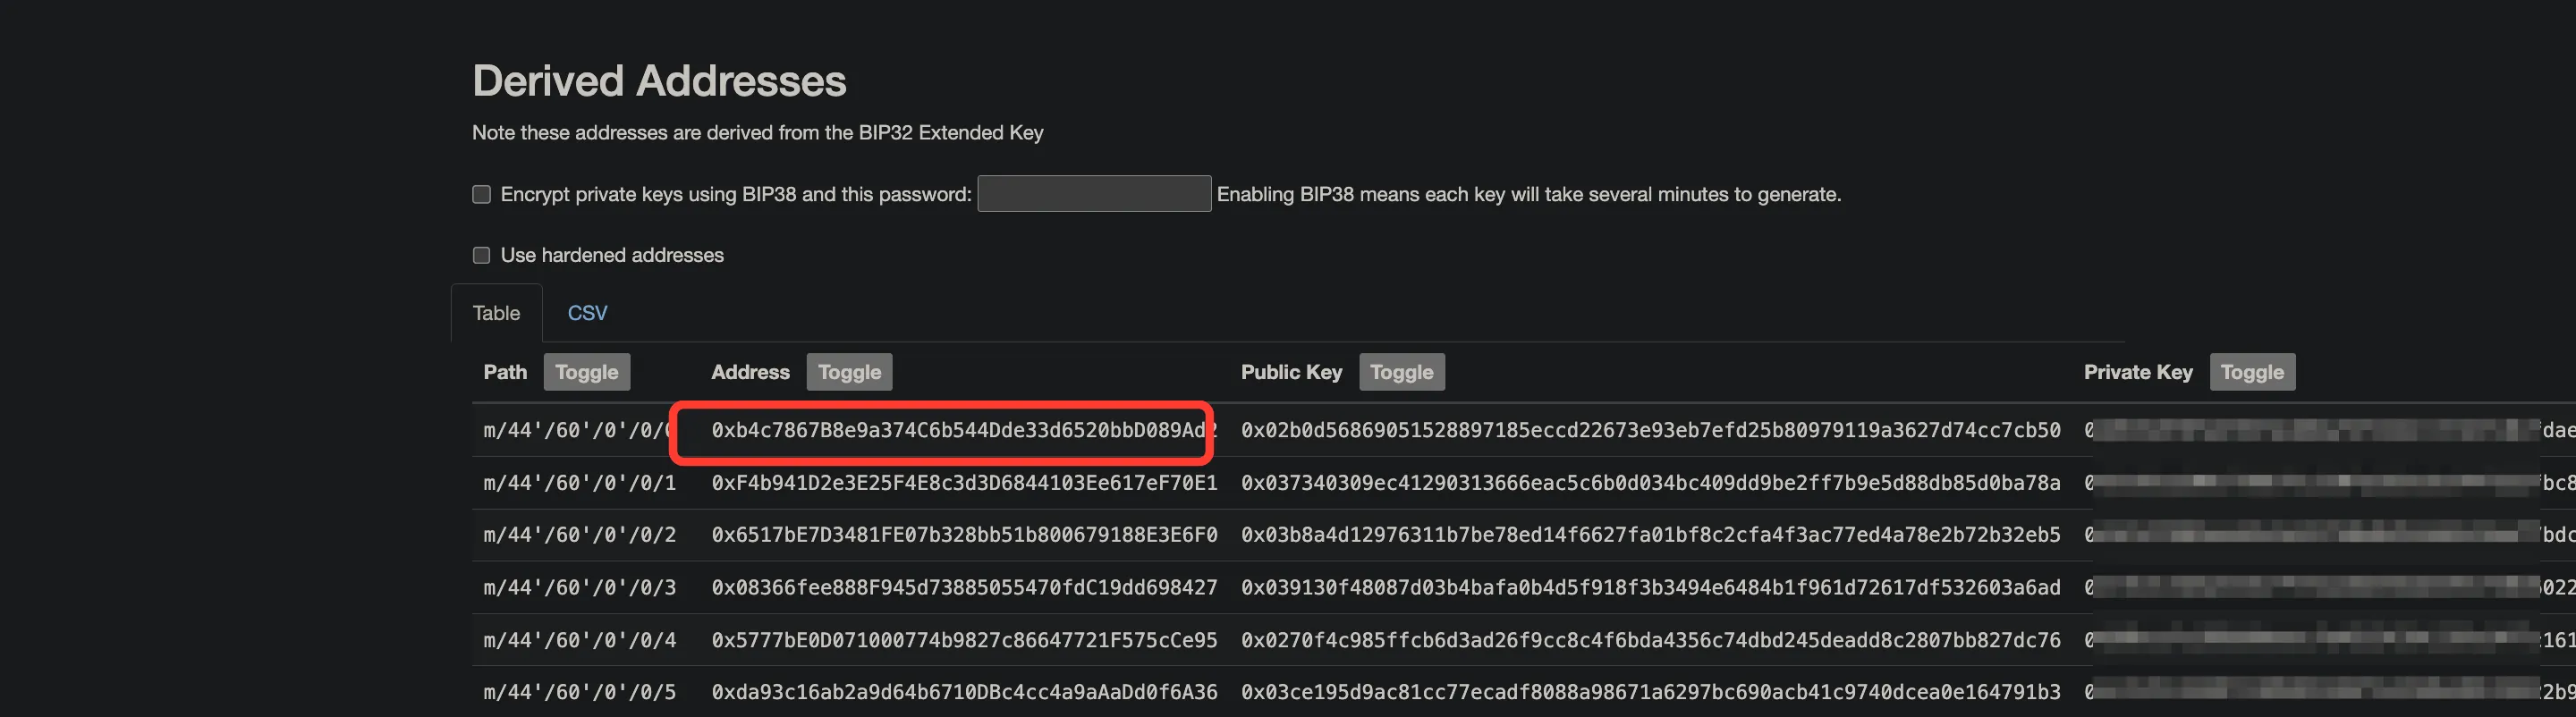
Before saving, click Verify key and enter your wallet's primary address — the first address (index 0) in the derived-addresses table under the BIP44 tab. If it matches, the key is correct.