WireGuard. Managing users
This article covers operations on the VPN user list: how to create another user, edit them, temporarily disable, fetch the connection configuration, and delete an account. The minimum "install the module and connect the first device" scenario is described in WireGuard quick start; here we go into more detail.
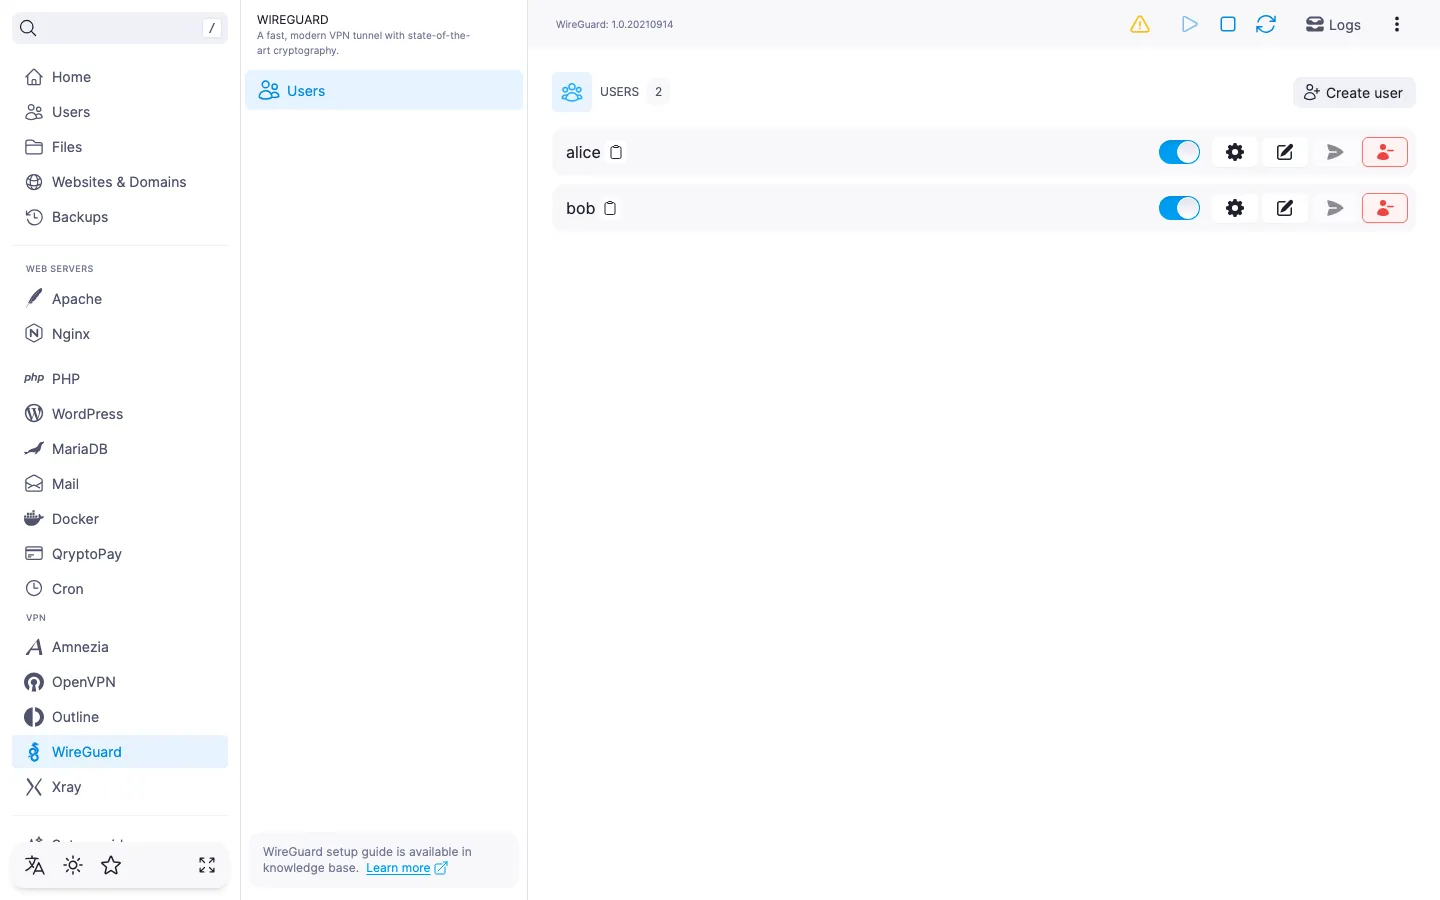
The user list
The list opens by default on the WireGuard module page. Each row is an account with an active-state toggle and a set of actions: open connection settings, edit, send the configuration by email, delete.
Above the list there is the "Create user" button and a user counter.
When there are no users yet
Right after the module is installed, the list is empty and the panel invites you to create the first user. Click "Create user" — the next steps are described below.
Creating a user
Click "Create user" in the top-right corner of the list.
Fill in the form:
- "Username" — 2 to 32 characters (Latin letters, digits, dot, hyphen, underscore); if left empty, the panel generates the name itself.
- "Email" — optional, needed if you plan to send the
.confby mail. - "Comment" — a label of up to 64 characters.
- "User language" — language of the email with the configuration. Defaults to English.
- "Enabled" — by default the user is created enabled; turn the toggle off if you don't want to activate them right away.
Click "Create".
If the chosen name is already taken or the email is invalid, the panel highlights the error under the field; while errors remain, the "Create" button is inactive.
ℹ️ Default values
On creation, the panel sets the client DNS server to 1.1.1.1 (Cloudflare) and persistent keepalive to 25 seconds. Both values can be changed afterwards in the edit dialog.
⚠️ ISP restrictions
Traffic encryption makes a VPN a reliable way to protect a connection, but in some countries and regions internet providers actively interfere with VPN protocols. Because of this, full availability of the service cannot be guaranteed — regardless of the connection type. If one protocol does not work for you, try another VPN module available in the panel. If none of them work on your network, contact support and we will issue a refund for the license.
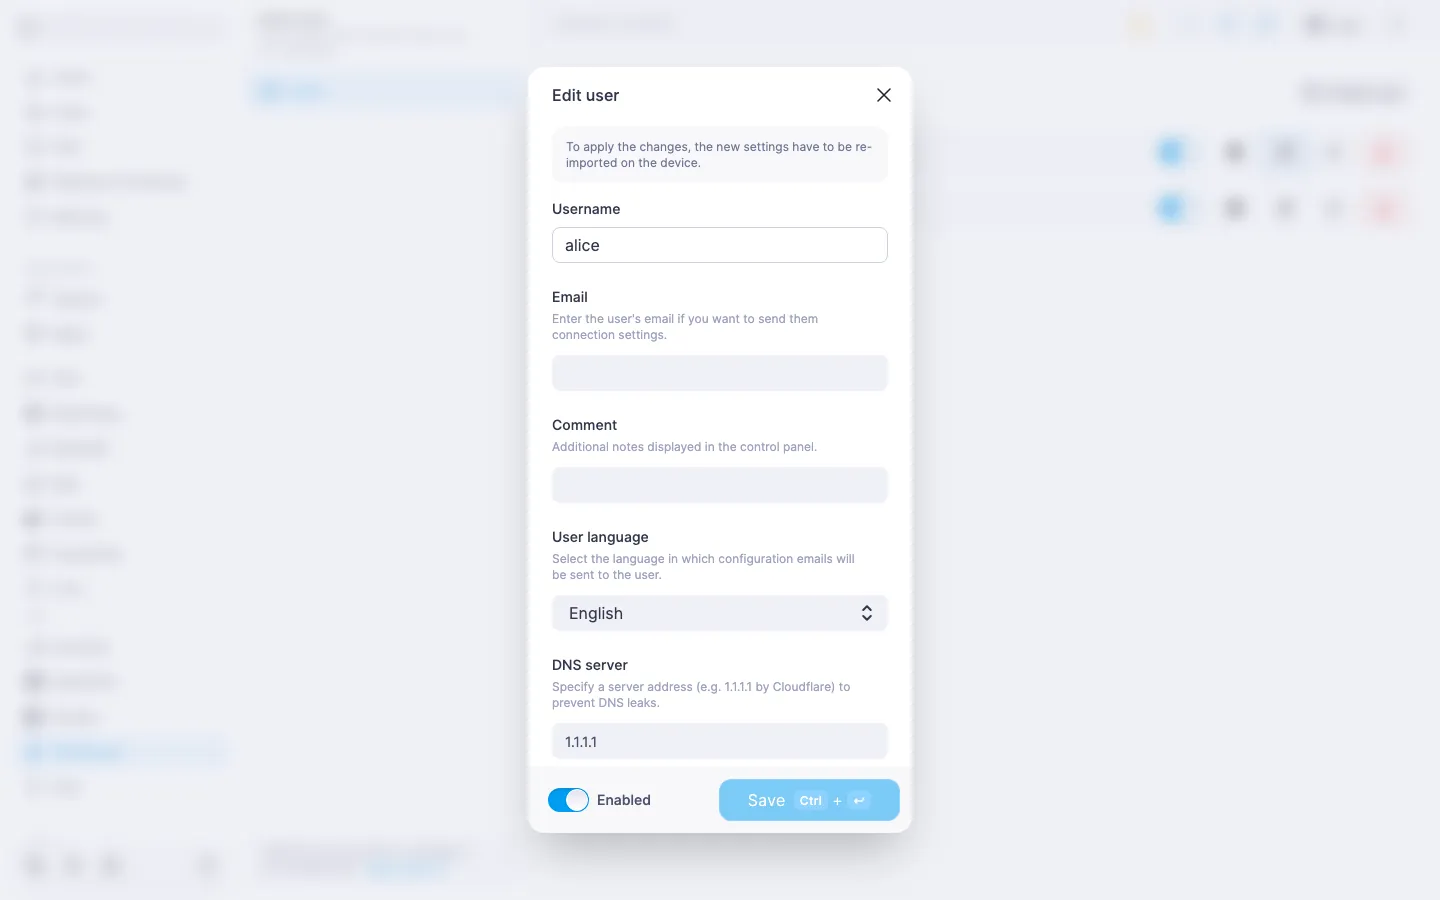
Editing a user
In the user row, click the "Edit" icon. The edit dialog opens; the panel reminds you that after saving, the configuration will need to be re-imported on the device — the old .conf in the WireGuard app keeps running with the old parameters until it is reloaded.
Compared to the create form, two fields are added that are not present at creation time:
- "DNS server" — the DNS that ends up in the client config (
[Interface] DNS = ...). A free-text field, default1.1.1.1. Specifying a DNS server helps prevent DNS-request leaks into the local provider's network. - "Persistent keepalive" — when enabled, the client sends a service packet every 25 seconds so the connection stays alive across NAT and public Wi-Fi. Enabled by default.
The email and the comment can be cleared by leaving the field empty before saving. The "User language" can be changed in the dropdown — this is the language used for the connection-settings emails. The username in this dialog is read-only — an existing user cannot be renamed. The "Save" button is active only when something in the form has changed.
Enabling and disabling a user
Each user row has a toggle: a single click enables or disables the account without opening a dialog. A disabled user stays in the list, but no one can connect to the VPN with their keys — the account is temporarily detached from the server. Changes take effect immediately; restarting the service is not required.
When a user is re-enabled, the keys are not reissued: the same .conf file already saved in the client app starts working again — there is no need to re-import the configuration. This makes the "temporarily revoke access" scenario easy.
Getting the configuration file
In the user row, click the "Settings" icon. The "Connection settings" dialog opens with a QR code for importing into the mobile WireGuard app and a download button for the .conf file for desktop. The text .conf contains the server endpoint, the keys, and the client parameters; the file name matches the username.
In the dialog footer there is a "Send to email" button. The same action is available straight from the user row without opening the dialog. The button is disabled if SMTP is not configured in the panel or if the user has no email address.
ℹ️ When the configuration did not generate
If the file cannot be obtained (for example, the WireGuard service was off when the dialog was opened), the panel reports in the dialog that the configuration is unavailable. Close the dialog, make sure the service is running, and open "Settings" again.
Deleting a user
In the user row, click the "Delete" icon (red). The panel asks you to confirm the deletion and warns that active connections will be terminated and a new configuration will be required to reconnect.
‼️ Deleting a user is irreversible
Right after confirmation, the account is deleted, and its key pair is lost forever. The .conf file imported into the client app stops working. The user cannot be restored "as it was" — even if you create a new one with the same name, the keys will be different, and the client will have to import a new .conf.
Useful links
- WireGuard quick start — installing the module and the first connection.
- WireGuard. Managing the module — service management, updating, and uninstalling.
- How to set up an SMTP relay for sending emails — so that the
.conffile can be emailed to users.