Proven over 15 years in hosting. Your VPS with BeAdmin is ready to go out of the box.
 Germany
 Netherlands
 Sweden
 Switzerland
 Spain
Spain USA
USA
The OpenVPN module in the BeAdmin panel runs your own VPN on the server using the time-tested OpenVPN protocol. Encryption is built on X.509 certificates: every user gets their own certificate, and the panel manages the entire key infrastructure on its own. OpenVPN is the most mature open-source VPN: clients exist for every platform, including older systems and routers. Modern DPI filters recognise OpenVPN by its distinctive handshake — where the provider actively blocks VPNs, Amnezia or Xray will work better.
This article walks through the minimum scenario: install the module, create the first user, and connect a client device.
ℹ️ Note
Your own VPN server pays off compared with commercial services: bandwidth is not split between hundreds of clients, and the number of users in the OpenVPN module of BeAdmin is not limited even on the free licence.
⚠️ ISP restrictions
Traffic encryption makes a VPN a reliable way to protect a connection, but in some countries and regions internet providers actively interfere with VPN protocols. Because of this, full availability of the service cannot be guaranteed — regardless of the connection type. If one protocol does not work for you, try another VPN module available in the panel. If none of them work on your network, contact support and we will issue a refund for the license.
You'll need a server with BeAdmin — our partners ship a ready‑to‑use VPS the moment you order.
Proven over 15 years in hosting. Your VPS with BeAdmin is ready to go out of the box.
GermanyNetherlandsSwedenSwitzerlandSpainUSAEuropean reliability made simple. Launch BeAdmin with your VPS in just one click.
GermanyNetherlandsSweden Estonia
 RomaniaSwitzerlandSpain
'%3e%3cpath%20fill='%2300008b'%20d='M0%200h384v256H0z'/%3e%3cpath%20stroke='%23fff'%20stroke-width='42'%20d='m1.914-.001%20382.086%20256m-382.086%200L384-.001'/%3e%3cpath%20stroke='red'%20stroke-width='14'%20d='M5.437%200%20192%20122M378.563%200%20192%20122M5.437%20256%20192%20134m186.563%20122L192%20134'/%3e%3cpath%20fill='%23fff'%20d='M157.787-.001h68.359v256h-68.359z'/%3e%3cpath%20fill='%23fff'%20d='M-.067%2093.999H384v68H-.067z'/%3e%3cpath%20fill='red'%20d='M384%20107.789H211.862V-.001h-39.724l.001%20107.79H0v40.419h172.139v107.79h39.723v-107.79H384z'/%3e%3c/g%3e%3c/svg%3e) United KingdomUSA
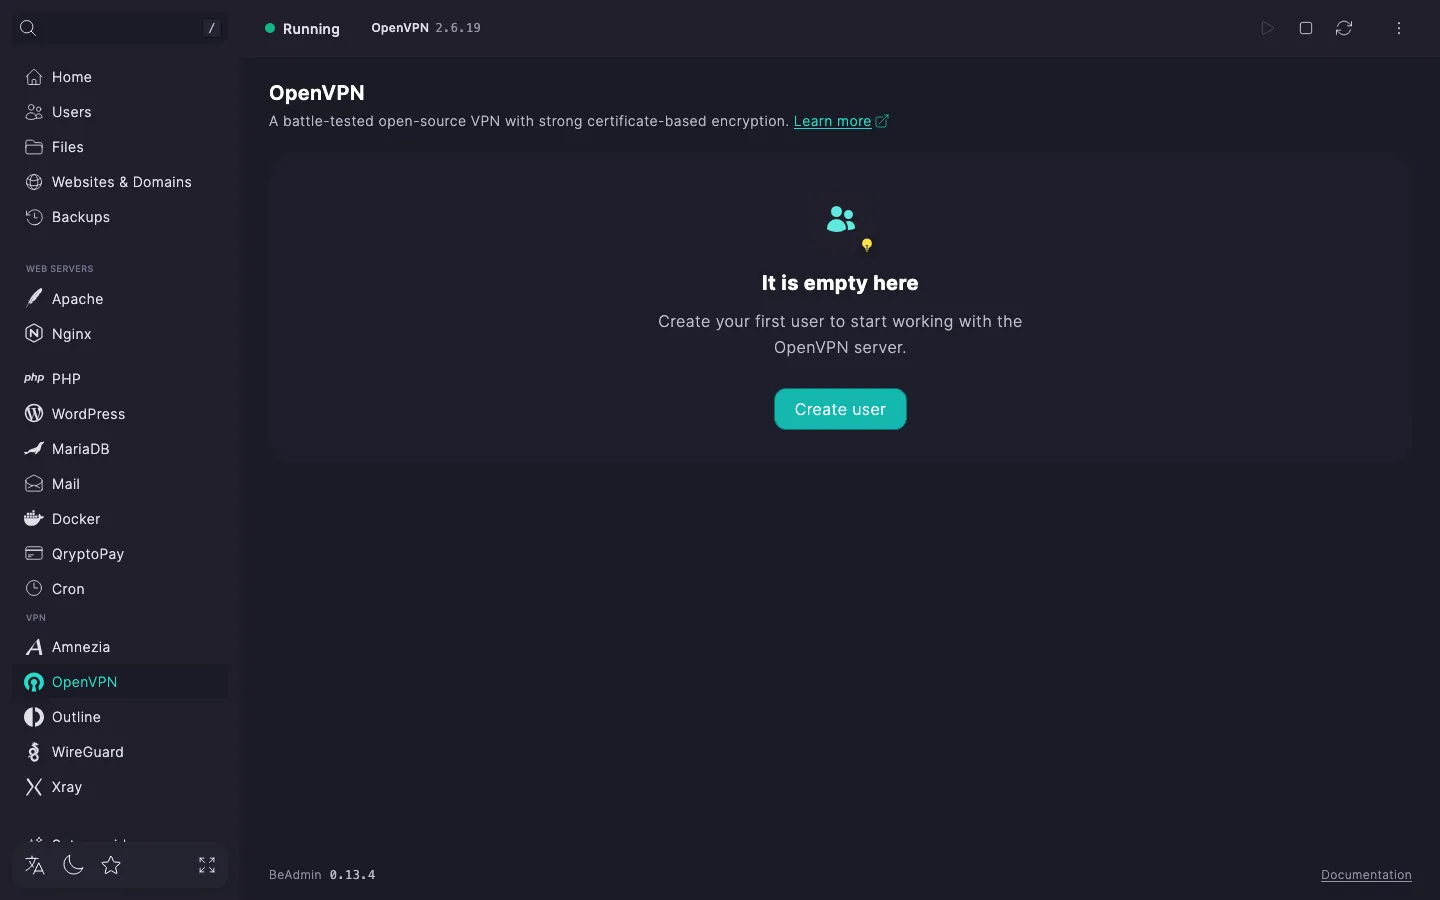
United KingdomUSAIn the side menu open VPN → OpenVPN and click Install — the module installs with a single button and is ready to use right after. By default, the server listens on UDP port 1194 — the standard OpenVPN port.
When installation finishes, the panel takes you straight to the Users page — the module's main screen. Installation usually takes a few minutes; you can follow the progress via the Log button on the install card.
The page header exposes the core module actions — start, stop, and restart. The three-dot menu holds the rest — checking and running an update, as well as reinstalling and uninstalling the module.
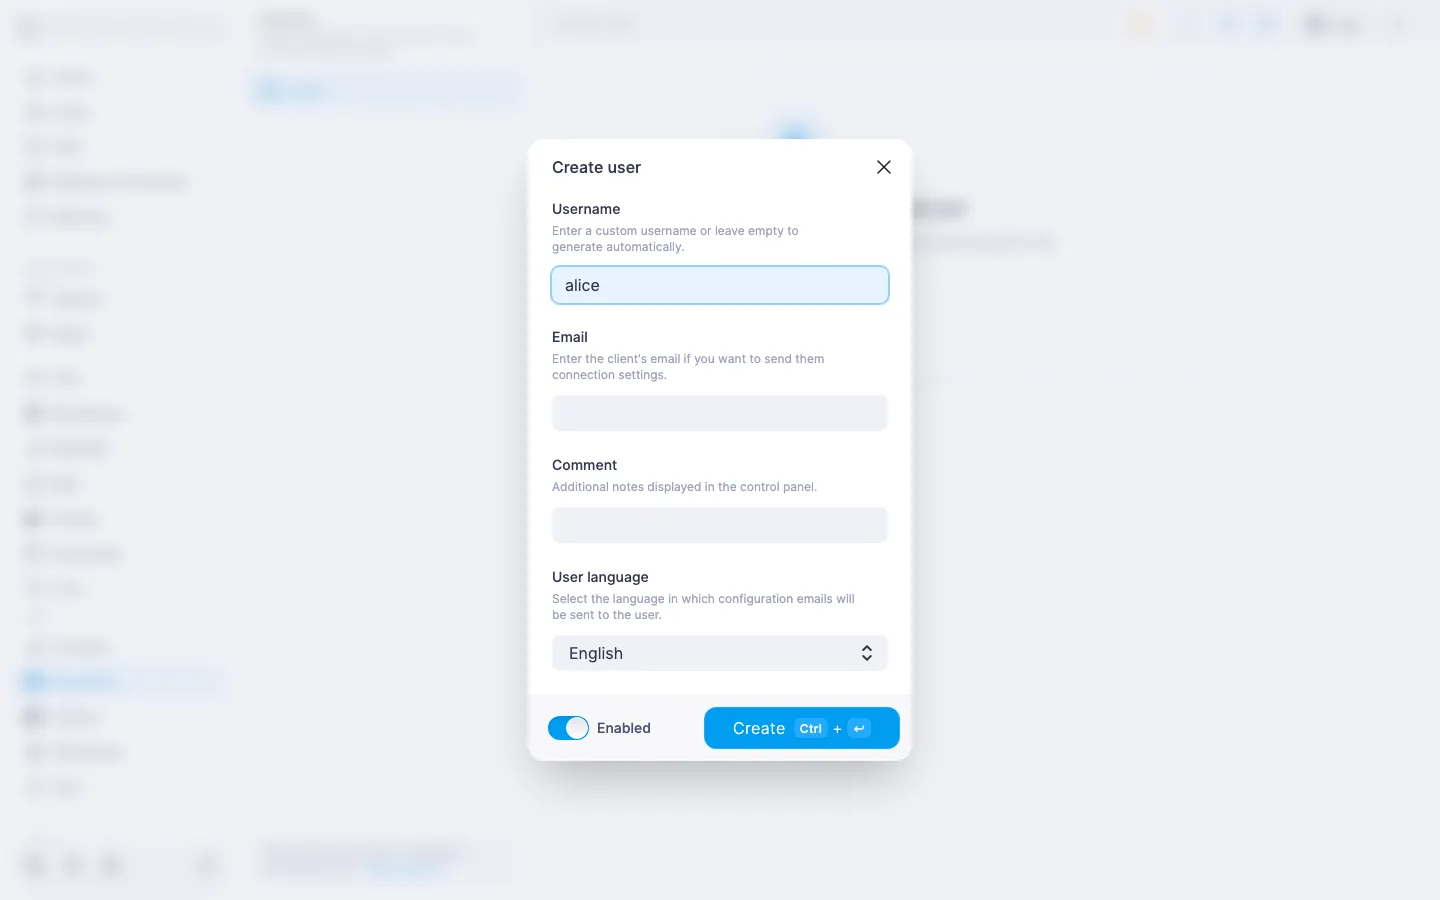
To get started, create the first user.
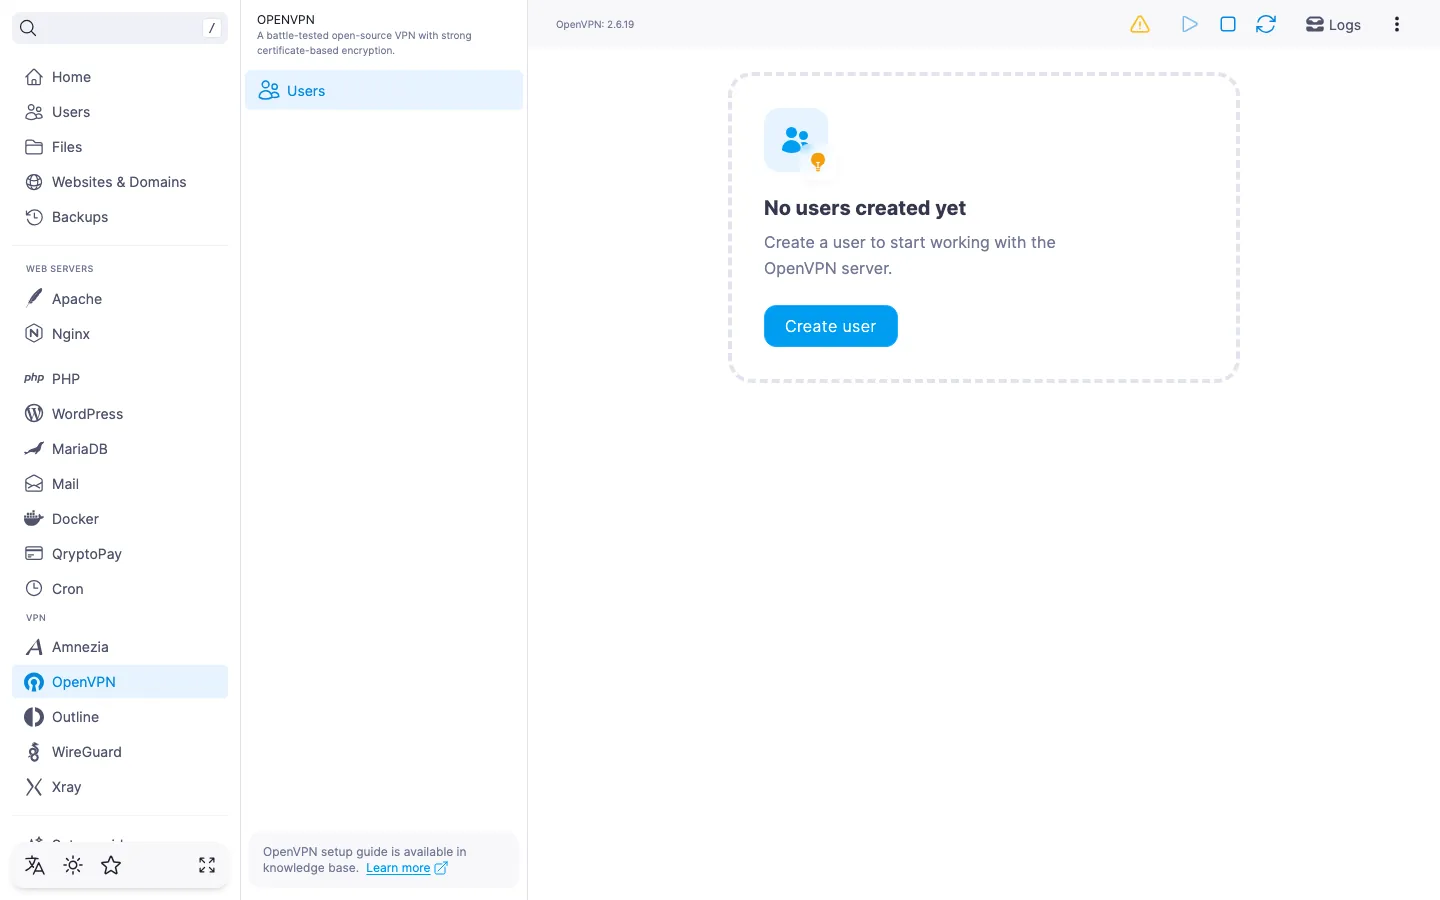
An OpenVPN user is a separate account with its own certificate and .ovpn configuration file. We recommend creating a separate user for each device that will connect: this makes it easy to revoke access for one device without touching the others.

The user appears in the list. The server issues a certificate and assembles the .ovpn configuration file — you can grab it right away.
OpenVPN uses a single .ovpn file with embedded certificates, keys, and connection parameters. There is no QR code or import link — the client only accepts the file.
Pick one of these apps for the connection:
Install one of the apps on the device that will route traffic through the VPN.
.ovpn configuration file. The file name matches the user name..ovpn file to the device however you prefer (email, cloud, or messenger) and open it in OpenVPN Connect — the app will offer to import the profile..ovpn. In Tunnelblick on macOS just double-click the file.To confirm that the VPN works, open any IP check page in the browser, for example myip.com. If everything is set up correctly, it will show the country of your server.
If SMTP is configured in the panel, the .ovpn file can be sent to the user by email — handy when the device is not within reach.
In the expanded user row click Email. The file goes to the address set when the user was created.
ℹ️ When SMTP is not configured
The email button stays inactive, and a note Email sending is not configured on the server with a link to settings appears in the expanded row. Details — in How to set up an SMTP relay for sending email. Downloading the .ovpn file works either way.